Explorer Patcher is a third-party software that is used to customize system files on Windows. With the Explorer patch, users can change the user interface Start Menu, File Explorer, etc. Users liked the software as they could customize the interface according to their preferences. However, users have been experiencing a lot of problems with their computer. Many users have encountered compatibility issues or system instability in the software. Many users have also reported that their Windows Explorer crashed and they could not perform any tasks on it. If you are looking for a guide to uninstall Explorer Patcher from your Windows 11 computer then check out our guide below.
Steps to Uninstall Explorer Patcher from Windows 11
Although Explorer Patcher is a great third-party software, if you are experiencing the above-mentioned problems it is suggested to uninstall the function. There are different steps to uninstall Explorer Patcher from Windows 11. Check out the steps given below.
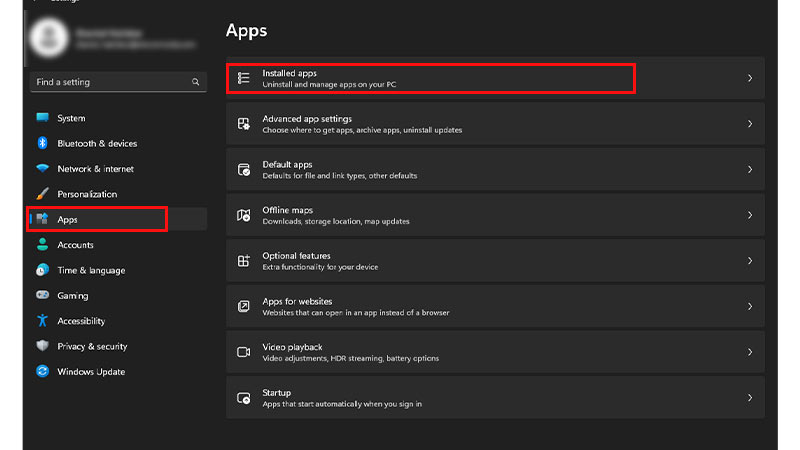
Windows 11 App Settings
- Go to Settings on your Windows 11 computer.
- Select the Apps option.
- Then click on Installed apps.
- A list of all the installed apps will appear on the screen.
- Search for Explorer Patcher in the search bar.
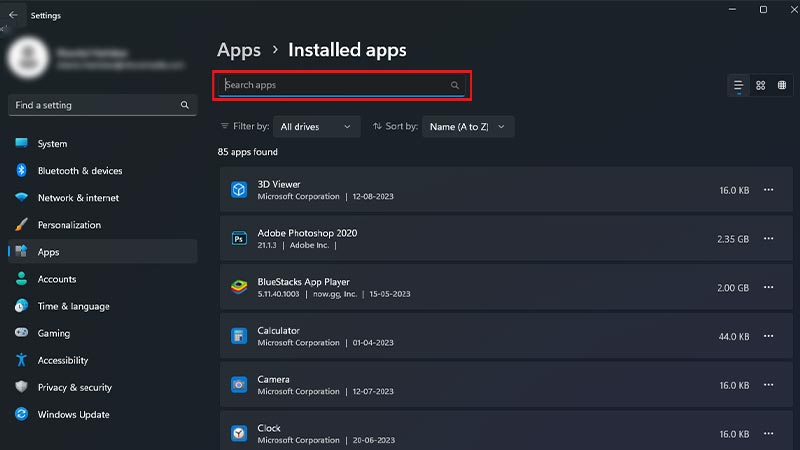
- Then click on the three dots next to Explorer Patcher and select Uninstall.
- Click on Uninstall again which will appear on the confirmation prompt.
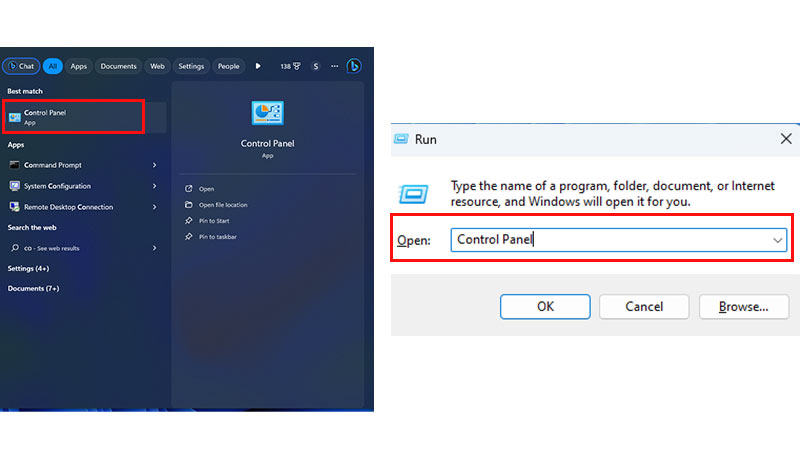
Control Panel
There are two ways by which you can open Control Panel.
- Searching for Control Panel in the Windows Search bar.
- Press the Windows + R keys to launch Run and type Control Panel in the type box.
Follow the next steps after launching the Control Panel by any of the two given methods.
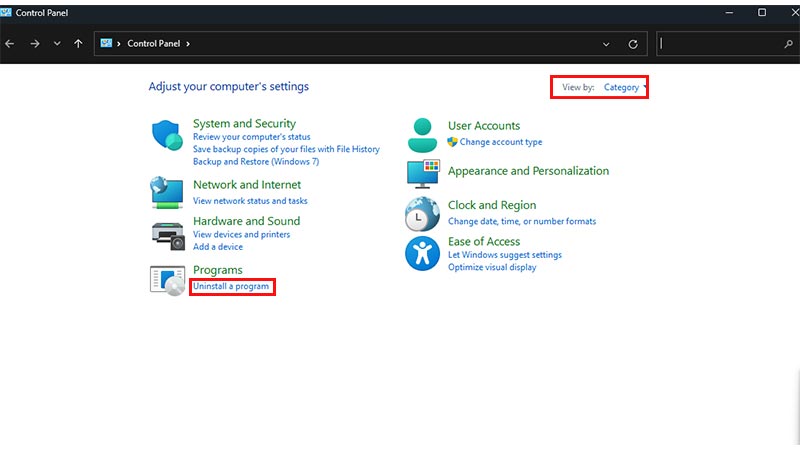
- Now select Category in the View by section.
- Click on the Uninstall a program option under Programs.
- Search for Explorer Patcher in the Uninstall or Change a program window.
- Right-click and select Uninstall.
- Then click on Yes in the User Action Control prompt.
Rename the Setup File
- Open File Explorer by pressing Windows + E.
- Look where the Explorer Patcher file is saved.
- Right-click on the file and select rename.
- Rename the file as ep_uninstall.exe.
- Double-click on the file.
- Click Yes on the ‘Are you sure you want to remove Explorer Patcher from your computer’ confirmation prompt.
Delete Explorer Patcher from Registry Editor
It is necessary to fully uninstall the Explorer Patcher along with its settings as it can lead to functionality issues in File Explorer.
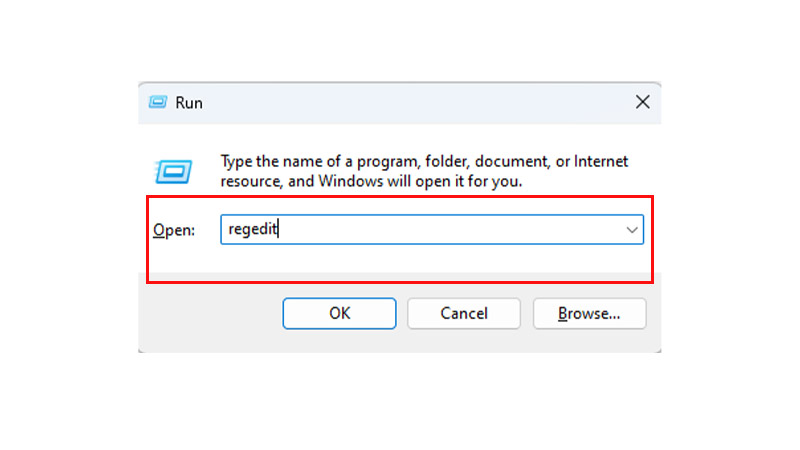
- Launch Run on your computer by pressing the Windows + R keys.
- Type regedit in the type box.
- The Windows Registry Editor will open on your computer.
- Now, type or paste the location given below:
- HKEY_CURRENT_USER\Software\ExplorerPatcher
- Now right-click on the Explorer Patcher file situated on the left panel.
- Then click on Delete.
- Click on Yes on the confirmation prompt.
That’s it, these were the methods to uninstall Explorer Patcher from Windows 11. If you liked the tutorial then check out our guide on How to fix Unspecified Error When Copying File or Folder in Windows 11.