There are times when you feel to remove an app from your iPad as you have not used them for a very long time. The reason can be to install a large size app or just to clear the clutter on your home screen. Unlike other tablets and phones, Apple also allows its users to manage the storage of their iPad. So, today in this guide I am going to explain to you how to uninstall apps on your iPad.
Steps to Uninstall Apps on iPad

There are two ways in which you can uninstall an app on your iPad. Both of these methods are discussed below in detail. So, let’s see both the steps below.
Uninstalling Apps from the Home Screen Itself
The first method by which you can uninstall an app from your iPad is from the home screen of your tablet by following this simple workaround:
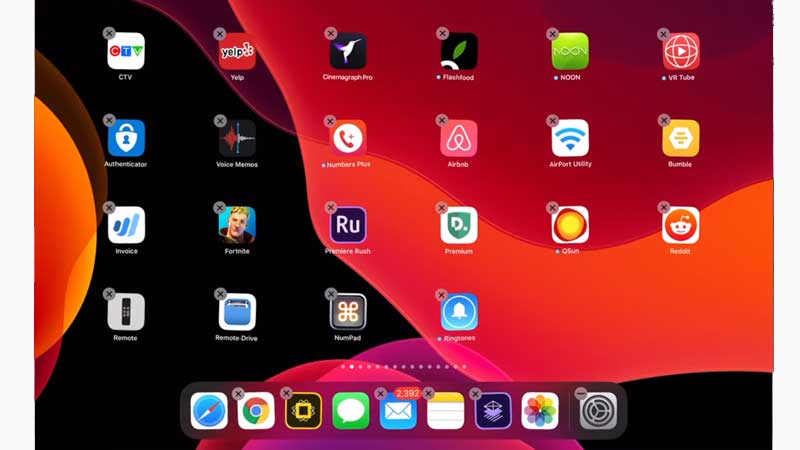
- Press and hold on to an empty space of your home screen. You can press and hold the app that you want to remove.
- In the pop-up menu, tap on “Delete App“.
- Now, tap on the “X” icon at the tip of the app.
- Again select “Delete” to confirm the process.
This is how you can uninstall an app on your iPad.
Uninstalling Apps from the Settings
The next method you can try is removing apps from your iPad’s Settings app by following these simple steps:
- Open the “Settings” app on your iPad.
- Now, tap on the “General” section.
- In the “General” settings, tap on “iPad Storage“.
- Here you will see all the apps installed on your iPad.
- Now, click on the app you want to uninstall and then tap on “Delete App“.
- Confirm the process by tapping on the “Delete App” in the pop-up menu.
This is how you can delete the app on your iPad.
This is how you can uninstall an app on your iPad. If you want to make a payment from your iPad using Apple Pay and don’t know how to do it, then here is a guide on How to Use Apple Pay on the iPad.
