
In Windows 11, Microsoft has strengthened the docking mechanism and expanded its functionality. Today, the latest version of Windows 11 offers multiple ways to split your screen into multiple windows and get the real work done, with better support for higher resolution screens and multiple monitors. In this guide, I will explain how to split screen in Windows 11 operating system at ease. Follow the different steps given below.
How to Split Screen on Windows 11 Operating System?
You will have to enable the Snaps Layout feature in Windows 11 before you can use split-screen on the same operating system. Here’s how to enable Snaps Layout in Win 11.
How to Enable Snaps Layout in Windows 11
- Open the Settings app in your Windows 11 operating system by pressing the Windows + I key together. Another way to open the Settings app is to press the Windows key on your keyboard to open Start Menu and here easily find and open Settings.
- After entering Settings, go to the System section. If you are not on the System section by default, then at the left sidebar you can tap on System.
- Tap on Multitasking which is located on the right side.
- After that, you will come across an option called Snap Windows, just enable or turn on the toggle for it.
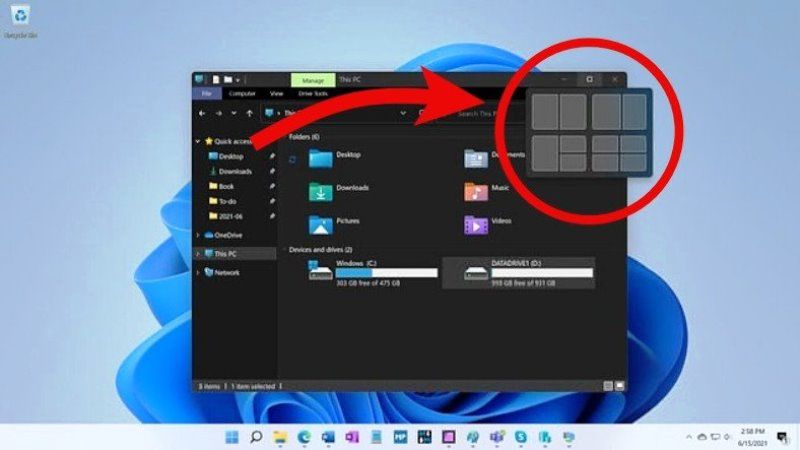
- Once you enable Snaps Layout, you can check the different options which can be used to change how the snaps layout works in Windows.
Using Split Screen in Win 11
Once you have enabled Snaps Layout in Windows 11, follow the steps given below. You can use keyboard shortcuts to split-screen in Windows 11, follow the below steps on how to do that.
- Windows Key + Up Arrow Key – It will help you to maximize the app window.
- Windows Key + Down Arrow Key – It will help you to minimize the app window.
- Windows Key + Left Arrow Key – It will help you to bring the app window to the left.
- Windows Key + Right Arrow Key – It will help you to bring the app window to the right.
- Windows Key + Right Arrow Key + Down Arrow Key – It will help you to arrange the app window at the bottom right corner.
- Windows Key + Right Arrow Key + Up Arrow Key – It will help you to bring the app window to the top right corner.
- Windows Key + Left Arrow Key + Down Arrow Key – It will help you to arrange the app window at the bottom left corner.
- Windows Key + Left Arrow Key + Up Arrow Key – It will help you to bring the app window to the top left corner.
That is all you need to know about using the split-screen in Windows 11. Also, do check our other Windows 11 Guides to get all the latest information on the new Microsoft operating system.