
Printing in Windows 10 is easy as you don’t have to select a printer every time you want to take a printout from your device. As Windows automatically sets recently used printer to default. But if you want you can change your default settings for the printer on your computer. So, today in this guide I am going to explain to you how to set the default printer on Windows 10.
Steps to Set Default Printer on Windows 10
If you have added multiple printers to your Windows 10 PC then setting any one printer which you use constantly as a default makes your work less time-consuming. You can set the default printer using two methods. Both the methods are discussed below.
Set Default Printer Using Control Panel
You easily set the default printer using Control Panel by following this simple workaround:
- First, open the “Control Panel” on your computer.
- After opening it, find and select the “Hardware and Sounds” section.
- In the “Hardware and Sounds” select “Device and Printers“.
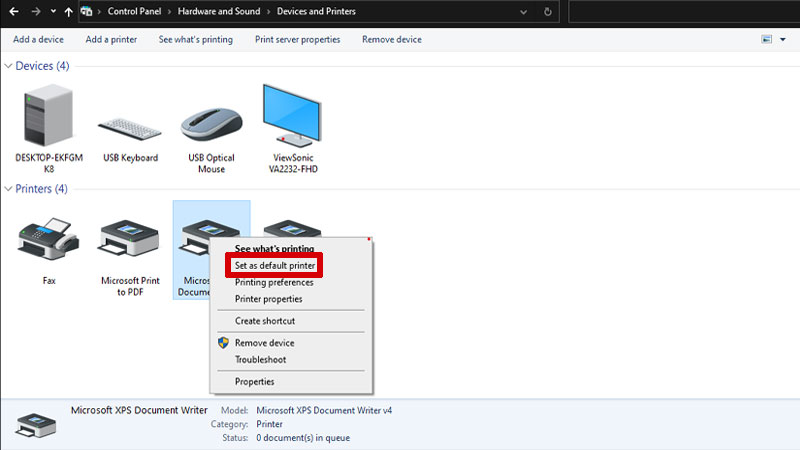
- Now in the next window, right-click on the printer you want to set as default.
- After this, click on “Set as Default” in the drop-down menu.
This is how you can choose a printer as default using the Control Panel of your Windows 10 computer.
Set Default Printer Using Settings App
You can set the default printer using the Settings app of the Windows 10 operating system by following these simple steps:
- Open the “Settings” app on your computer.
- Now, go to the “Devices” section and select “Printers and Scanners“.
- Under “Printers and Scanners“, check the box next to “Let Windows manage my default settings” located at the bottom of your screen.
- Now click on the printer name you want to set and click on the “Manage” option.
- Next, click on the “Set as Default” option.
By doing this, you have successfully set that printer as your default printer. This only works for third-party printers as windows have already set virtual printers as default.
This is all you need to know about how to set default printer on Windows 10. If you are facing any error that says Windows 10 cannot add your printer then here is a separate guide on How to Fix Error 740 While Adding Printer on Windows 10/11.