The display orientation of any computer should be adjusted as per a user’s need. There are times when you may have to rotate your Windows 11 PC’s screen. For instance, while projecting your screen to a surface, sharing the screen with another device, or if you use the tablet mode on Windows 11. All these situations ask for a different screen orientation on Windows 11. The best thing is that changing the screen orientation on Windows 11 is a cakewalk and there are certain shortcut keys for it too. So, in this guide, we will show you how to rotate the screen on Windows 11.
How to Change Windows 11 Screen Orientation
You can rotate the screen on your PC either from the Settings app or with the help of some shortcut keys. We have mentioned both of these methods right below:
Use Display Settings to Rotate Screen
- Press the ‘Windows + I’ shortcut keys to open the Settings App.
![display-settings]()
- Select System > Display.
- You will see ‘Display orientation’ under the ‘Scale & layout’ section.
- Click the Display orientation drop-down menu and you will see four different display orientations for Windows 11:
![display-orientation]()

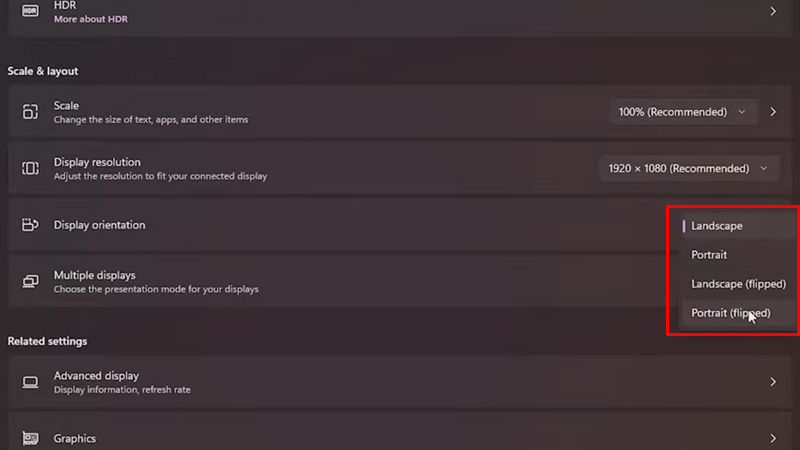
- Landscape: The same layout that comes selected by default on all Windows computers.
- Portrait: Select Portrait orientation to rotate the screen by 90 degrees to the left on Windows 11.
- Landscape (flipped): This orientation completely flips the display and the complete Windows 11 layout turns upside down.
- Portrait (flipped): Similar yet opposite of the Portrait orientation on Windows 11. It rotates the display 90 degrees towards the right.
You can select any of the orientations that you need to set for your Windows 11 computer. You will see a prompt asking if you wish to keep the new changes or revert to the previous layout.
- Select ‘Keep changes’ or the Windows 11 display layout will be changed back to default within 10 seconds.
Use Keyboard Shortcuts to Rotate Windows 11 Screen
If your PC has an Intel processor, you can change the screen orientation with shortcut keys too. Here are the shortcut keys to rotate the screen on Windows 11: 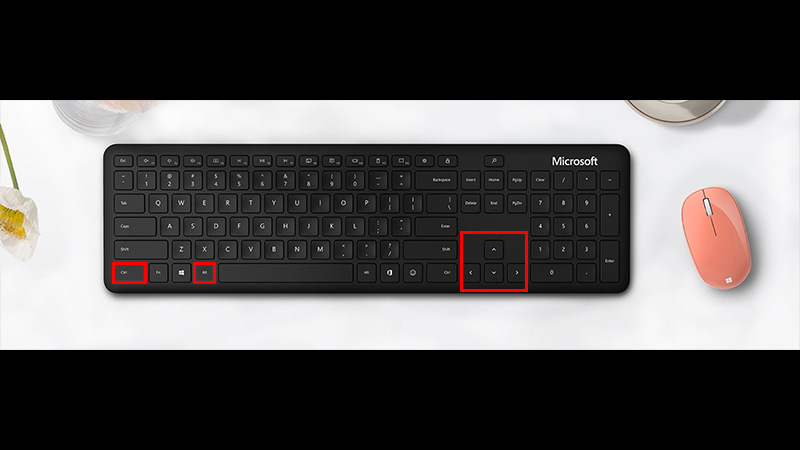
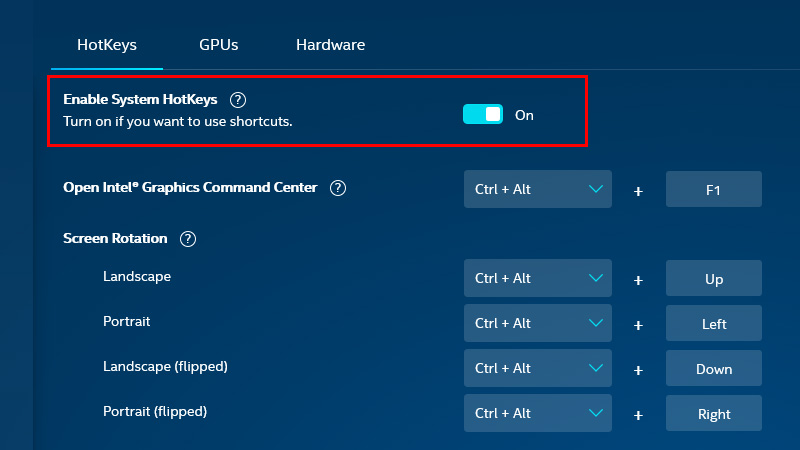
- Ctrl + Alt + Up arrow key: Landscape mode
- Ctrl + Alt + Down arrow key: Landscape (flipped)
- Ctrl + Alt + Right arrow key: Portrait mode (flipped)
- Ctrl + Alt + Left arrow key: Portrait mode
But wait, you can’t use these shortcuts directly. First, you need to enable hotkeys on your Windows 11 PC. Here are the steps for the same: 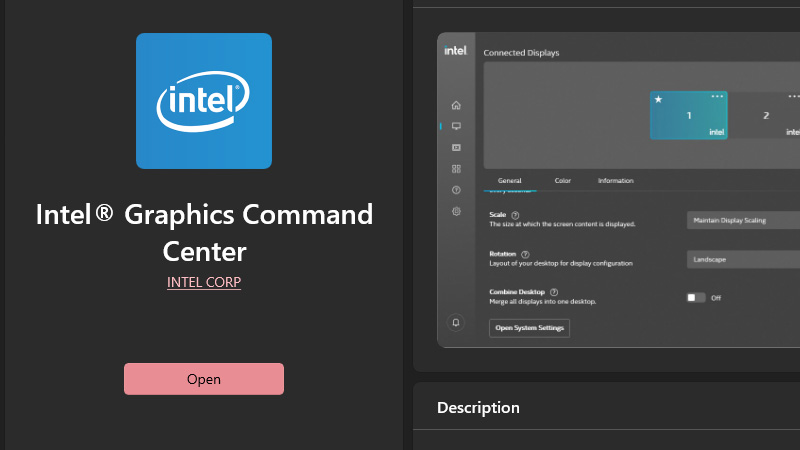
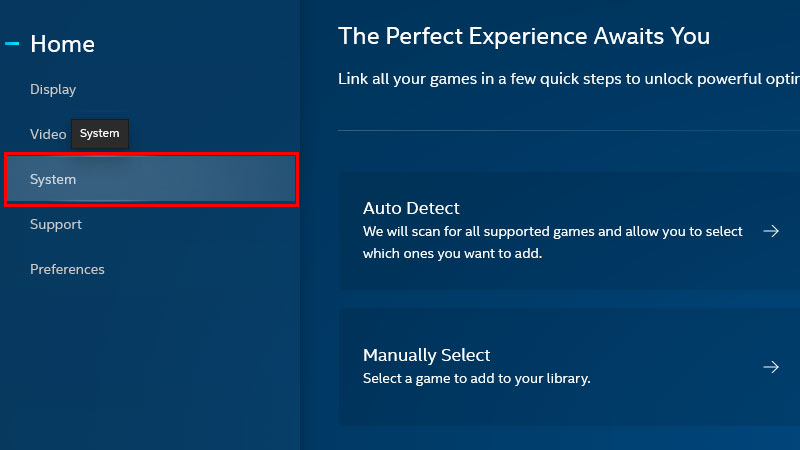
- Open the Intel Graphics Command Center app. You can search for it in the Start Menu or download it from the Microsoft Store.
![system-tab]()
- From the left pane, select the ‘System’ tab.
![enable-system-hotkeys]()
- Turn on the toggle bar for ‘Enable System HotKeys’.
- Now, try pressing those shortcut keys on your Windows 11 system and see your screen rotating.
So, this is everything that you need to know about how to rotate the screen on Windows 11. Change your screen’s orientation to adjust it according to your usage and preference. Here are some other guides on similar topics which might be useful for you: Windows 11 Not Detecting Second Monitor? Here’s How to Fix It and Windows 11 Shortcut Keys List.