
OBS Studio is a free streaming software with recording capabilities. That means you can use it for screen recording. This software is used by many Youtubers and streamers alike and so it has made a name as the industry standard for live streaming. The ease of use and free-of-cost nature of this software certainly gives to its popularity. Even if you are not a content creator, you can use this for your own purposes like recording your screen and capturing whatever is on it. Find out here how you can easily record your screen with it in a step-by-step guide.
Recording your Screen with the Help of OBS
If you haven’t already installed OBS you can do it from here, as you will need it to record your screen. OBS is free to download and works on most platforms including Windows, Linux, MacOS, etc. Simply, download the installer and follow the instructions on it to install OBS. It is small software in size so it won’t require much space on your hard drive. However, make sure you have space for the videos it will capture as they get saved on your hard drive
Here are the step-by-step instructions on how to record your screen by using OBS:
Install and launch OBS.
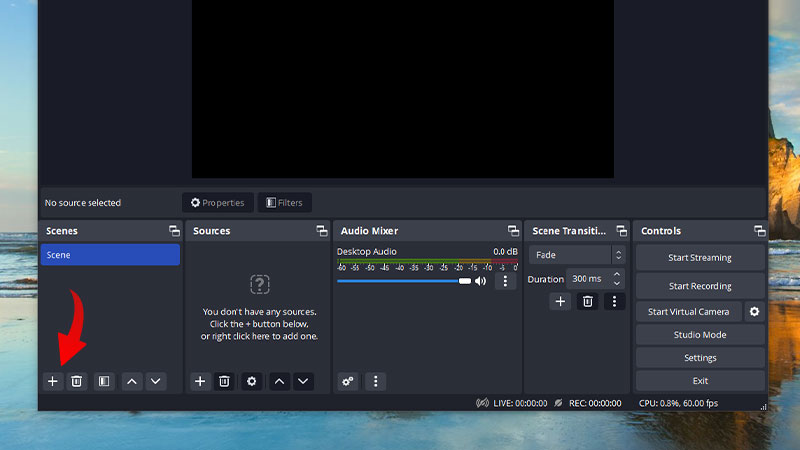
By default, OBS will launch into a Scene. But if not, click on the + symbol at the bottom left side in the Scenes section.
1. Now click on the + symbol in the Sources section on the right side of the Scene section.
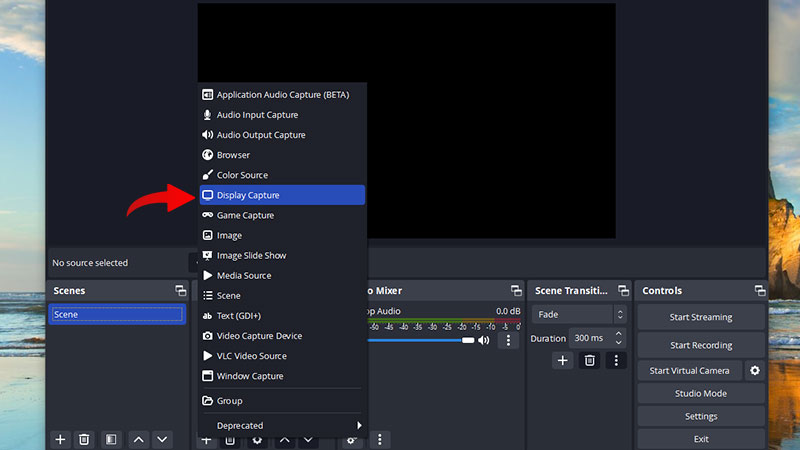
2. Here, select Display Capture.
3. In the pop-up window, give it a title and click on OK.
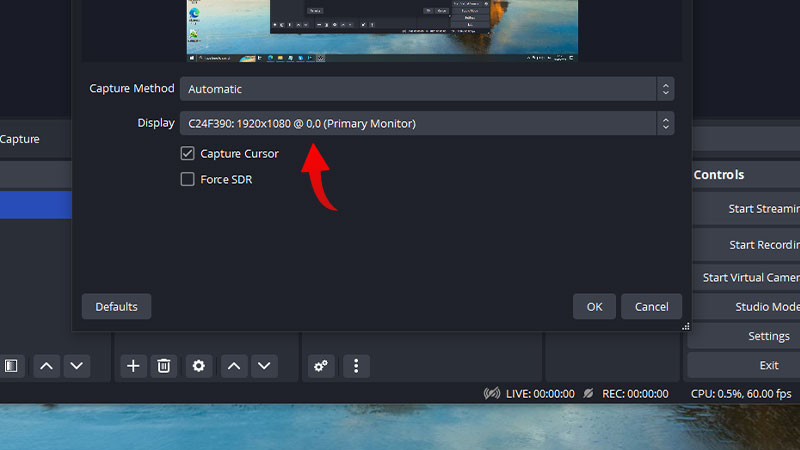
4. Now, in the next pop-up, select the display that you want to record and click OK.
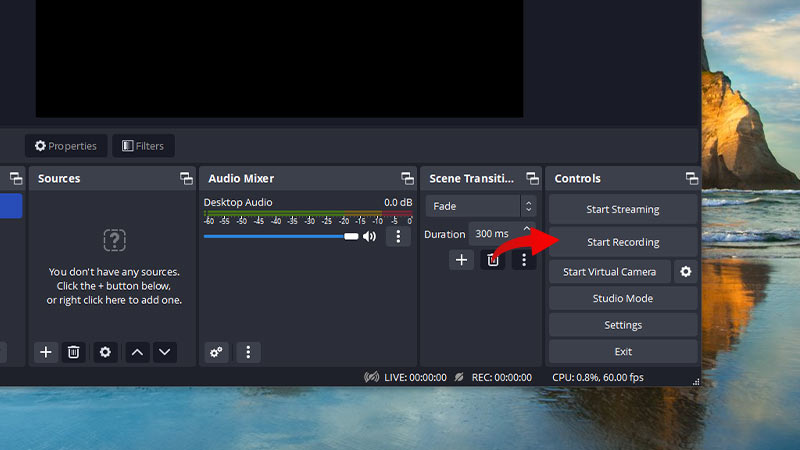
6. You are all set, simply press Start Recording on the bottom right side of OBS. You will now be recording your screen.
Another thing to note is that this recording will be saved in the default directory in which OBS saves. If you want to change this file path, go to Settings which will be on the bottom right of OBS. Then go to the Output section on the left and change your file path in the Recording Path option. Recording on OBS works the same way no matter which platform you are on. So this method will apply if you are on Windows, Linux, or MacOS.
You will now be well on your way to recording the content you want on your screen whether it be a video game or any other media that you want to record using the help of OBS. If you are interested in other things related to it, you can check out our other articles such as what is OBS and how to use it and also Streamlabs vs OBS which one is better?