
Windows 10 comes with a Ready Boost feature. A way to speed up performance using Caching. The ready Boost function is best for notebooks and laptops. Also, you can use this on the Desktop system and speed up app launches on the operating system.
What Is Ready Boost?
Ready Boost is a kind of feature that absorbs and stores all the cache data, application files, in a USB- Drive or SD Card. In this way, the ready boost works inside the operating system. You can allot a specific part of your hard drive or use a USB drive to cache the frequently used applications.
Note
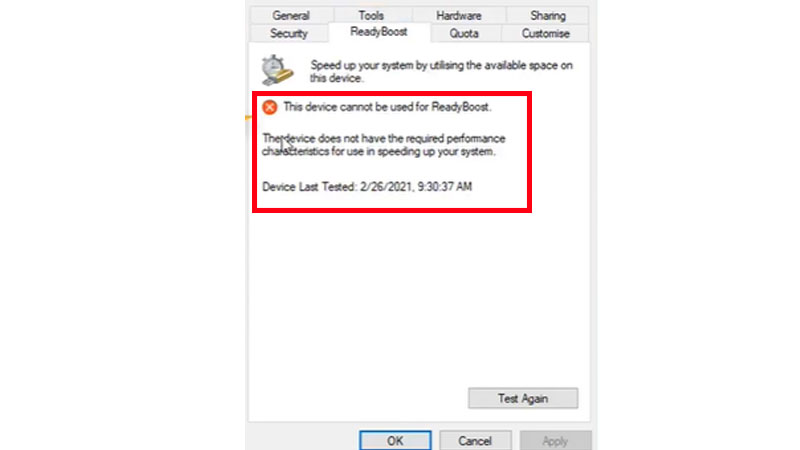
If you have a platter-based hard disk then you are going to find this ready boost process more efficient, but if you have an SSD (Solid State Drive) so, you are not going to experience any type of speed in your windows performance. You may witness an error like you can’t enable a ready boost.
Guide To Ready Boost Windows
If you are using an older platter hard drive then you can go for a ready boost process. Insert a USB – Drive in your windows PC or Laptop.
- Once you have inserted it, head towards “This PC” and Right Click on the USB – Drive
- Click on Properties > a new tab will be opened, from the top menu bar hit on “Ready Boost”
- Select “Dedicate this device to Ready Boost” > Click on “Apply” > after loading the process hit “OK”
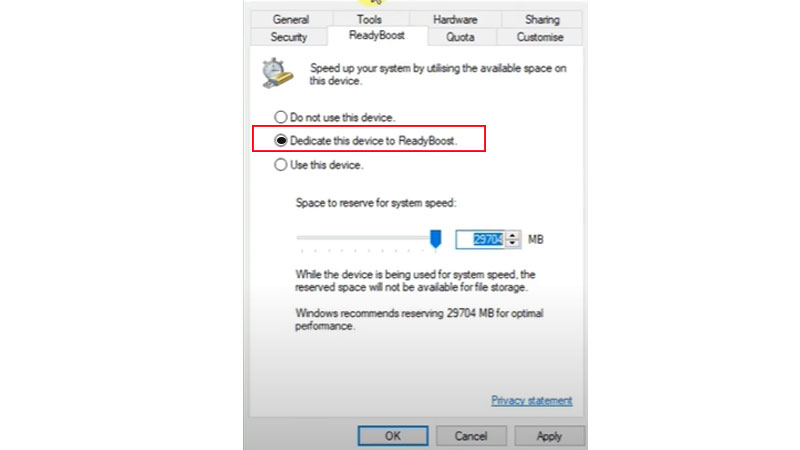
- A new ‘ready boost of cache’ will be created in the root of the drive’s directory. Now you may notice some changes in windows performance.
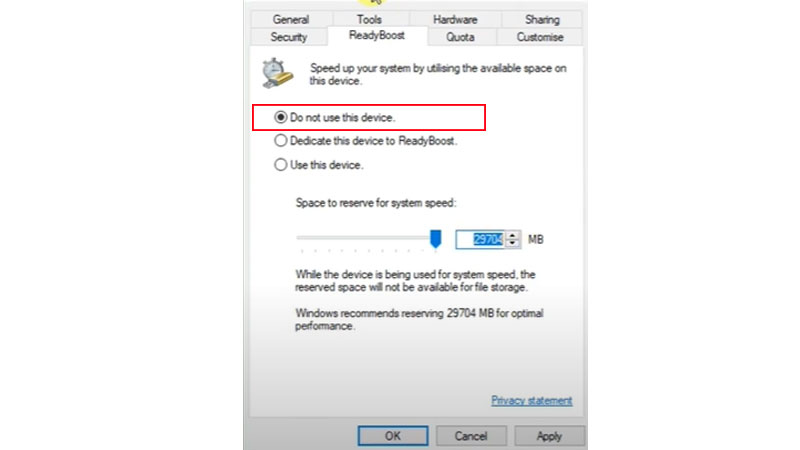
If in case you want to disable it right-click on USB-Drive > properties > Ready Boost > Click on “Do not use this device”.
To Monitor your performance
If you wish to monitor your ready boost performance, this will show you some frequencies about how’s it working.
Step 1 – Search for “Performance Monitor” in your search bar.
Step 2 – A default performance monitor will show up, click on “Performance Monitor”
Step 3 – It will start showing some percentage, but you have to add a filter to track the cache files, > Click on “green colored plus sign” > select “Ready Boost Cache” > hit on “Add” > click on “OK”
You will notice a change in your windows performance, even you can keep a track of this process. Just a short reminder for you, this process is not going to work on Solid State Drive.