If you are using Microsoft Teams but cannot get it to recognize your webcam, do not worry, as we have got you covered in this article. In this guide, I will explain why this common issue occurs and give you various solutions to fix the problem that should allow Microsoft Teams camera to work properly again. Follow the steps in this tutorial to fix the camera not detecting in Microsoft Teams below.
How to fix Microsoft Teams Camera Not Working in Windows 11?
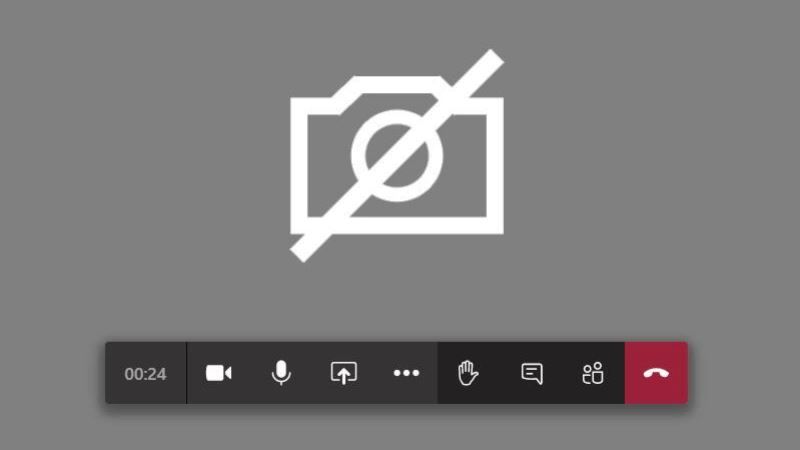
There are millions of people who rely on Microsoft Teams to attend video conferences. However, sometimes Microsoft Teams is unable to detect the camera. It simply means that you won’t be able to share video or photos, and other participants also cannot see you.
You might also get all kinds of error messages in the process, for example, the camera is not working, or camera is not detected or No available camera found. So, in this guide, let us find out how to fix this problem on your Windows 11 system.
Method 1: Fix Microsoft Teams by Configuring Camera Settings
- First of all, launch Microsoft Teams on your Windows 11 computer and then click on Profile menu > Settings.
- After that, click on Devices and then scroll down and select the correct Camera.
- Then you have to check your camera preview or use the drop-down menu to select the camera you want to use and ensure it is working properly.
- Then click on Permissions and make sure Teams is allowed to use the camera. Activate the Media option.
- After completing the above process, you can try to make a test call or call someone in your contacts to see if the camera is working fine.
Method 2: Enable Privacy Settings
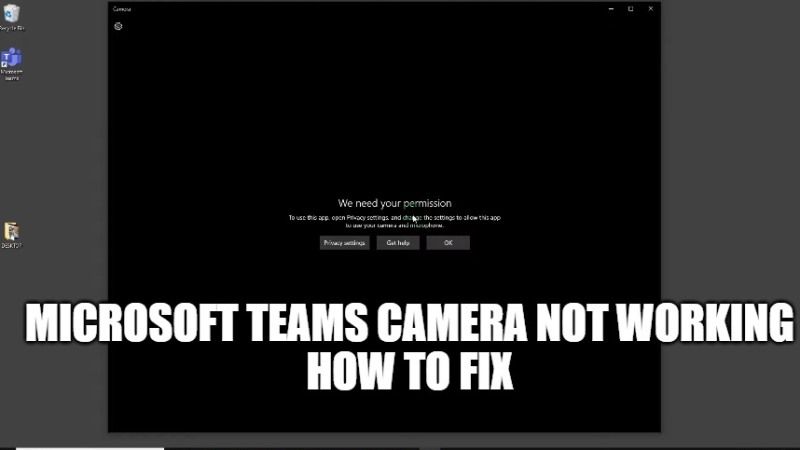
Windows 11 comes with built-in privacy settings that you can use to prevent apps from accessing your camera. If you’ve disabled these settings, Microsoft Teams won’t be able to access and use your camera. Here’s how to enable it:
- Press Windows + I keys together to open Settings.
- After that click on Privacy and then click on Camera on the left side pane.
- On the top, click on Change under the “Allow access to the camera on this device” and turn on Camera access to this device.
- Now you need to turn on the toggle switch next to “Allow apps to access your camera” as well as “Allow desktop apps to access the camera” which is located at the bottom.
- Make sure the option is on and Teams is on the list.
- Note that if you installed Teams from the Microsoft Store, go to Choose which Microsoft Store apps can access your camera. Enable the option and enable Teams.
- Done.
That is everything you need to know about how to fix Microsoft Teams camera not working issues. For more Windows 11 Tips and Tricks, check out our other Windows 11 Guides section only on TechNClub.com.