Signing documents is made easy as you don’t need to have a hard copy of the document. Yes, you can easily sign a document on your computer screen. In your Mac, you can easily create a digital sign and use it on all the documents that require your consent. So, today in this guide I am going to explain to you how to make an electronic signature on macOS Monterey.
Steps to Make an Electronic Signature on macOS Monterey
An electronic Signature is also known as a digital sign and is a very handy feature if you don’t have a printer or don’t want to waste paper. This feature also comes in handy if you want to send a document that is saved on your computer with your signatures. There are different ways in different apps to create an electronic signature on macOS Monterey. Some of them are discussed below:
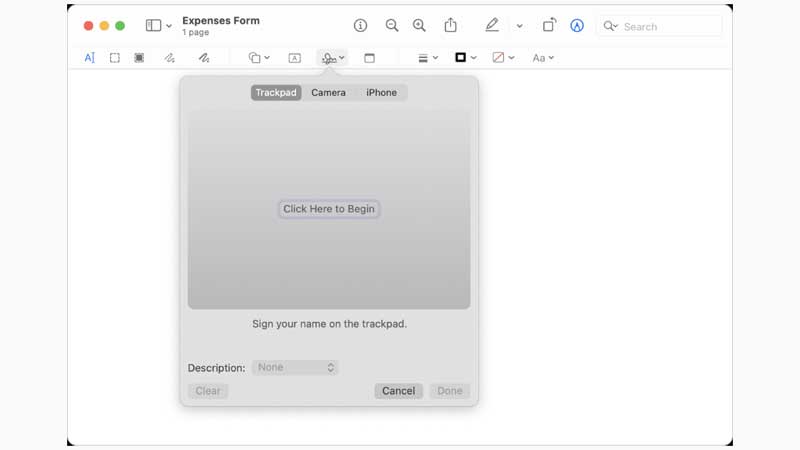
- In the Preview app, click on the “Markup Toolbar” ( if you cannot see the option then click on the “Sign” icon.)
- Now in the next window, the “Trackpad” option is already chosen as default.
- If you want to use your Mac’s trackpad or mouse then click on the blank space in the window.
- Now, draw your signature with your fingers on the mousepad.
- If you want to use your Mac’s camera then choose the “Camera” app in the window.
- Now sign on a blank sheet and hold the sheet in the front of your webcam.
If you have stored your signature on your iCloud account then you can insert it into a document using the preview app. You can also use the Preview app to capture your signature and use it in another app.
This is how you can make an electronic signature on macOS Monterey. If you are using Apple iPhone or a Tablet and want to consent to a document then here is a separate guide on How to Sign a PDF document on iPhone and iPad.