Extensions are very convenient because they allow you to upgrade your browser and then surf the web with the help of a series of useful tools for your business. You will be glad to know that with the latest iOS 15 and iPadOS 15 updates, it is now possible to use Safari extensions on iPhone and iPad. For Mac, there are an infinite number of extensions that add just as many capabilities to the browser. In this guide, let us find out how to install and use Safari extensions on iPhone and iPad.
How to Install and Enable Safari Extensions on iPhone and iPad
The extensions have existed for browsers on computers for years, and with iOS 15 they also arrive on iPhone and iPad. It is clear that not all of them must be installed but only those most useful for your business: there are extensions that can give you a big hand to everyone.
At the time of writing on the App Store, there are already dozens of them, free and paid, which allow you to enhance Safari even on portable devices. But how are they installed? And how are they used?
Here’s how to install Safari Extensions on iPhone and iPad
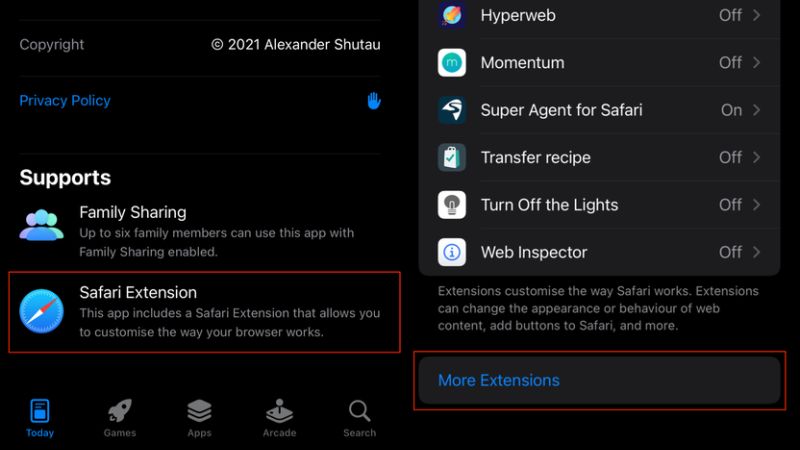
If you have already installed iOS 15 you are well underway. Because now you just have to open the “Settings” app on your iPhone or iPad, click on the “Safari” tab, then scroll down until you find the “Extensions” panel: from here, click on the “Other extensions” link.
Alternatively, you can open the “App Store” app, select the central “App” tab and scroll down until you reach the “Top categories” section and select the “Safari Extensions” tab; you could also type “Safari Extensions” in the search bar, but you will get the simpler list of extensions instead of going to the actual section as it is possible by following one of the two methods previously described.
In any case, whatever the route used, the extensions are presented as normal applications, so the installation process is the same: open the tab, read the description and if it seems interesting to you, proceed with the installation by clicking on the button “Get” and authorizing the process (or payment, if it is not free) by password, fingerprint or face scan, according to the default authentication system of your device.
Here’s how to enable Safari Extensions on iPhone and iPad
Now that you have the extension installed, that’s not all. In fact, by default they are not enabled, so you have to follow another series of steps to be able to put them to work. At the end of the installation of the extension (or extensions, if you have chosen more than one) go back to the “Settings” app, under the “Safari > Extensions” section, here you will see the list of all those that you have downloaded.
Each extension will be deactivated by default. You must therefore activate them manually, one by one, by accessing the appropriate tab and activating the first switch at the top right which is next to the name of the extension. If present, you can also adjust the type of access to websites from the panel below dedicated to “App permissions”: under “All websites” you can select “Ask” to make the extension ask from time to time how to behave, or “Reject” if you do not want to access the websites (but some extensions without authorization will then not work) or “Allow” to leave access fully active.
That is everything you need to know about how to install and use the Safari browser on iPhone and iPad. While you are here, do not forget to check out our other guides on How to Reset Passcode Locked iPhone Without PC, and How to Look at Blocked Numbers on iPhone.