Have you installed Windows 11 on your computer and like its new features? In any case, however, Telnet will not be certainly enabled by default in your Windows 11 system. Telnet is an indispensable client/server protocol for connecting to remote servers (Telecommunications Network). It is an application that allows you to communicate with a machine remotely, via the TCP/IP protocol. Let us find out how to install Telnet on your Windows 11 computer or how to enable it.
How to Install Telnet on Windows 11?
You might have noticed that the Telnet and ftp clients are not installed by default in Windows 10 or Windows 11. To install them you need to go into the system features and add them, that’s where you need to go. If you really want to use Telnet, follow this guide on how to activate Telnet on Windows 11.
Here’s how to install Telnet client in Windows 11
- First of all, click on the Search icon on Taskbar and type Control Panel.
- After that, choose Control Panel from the lists that will be shown.
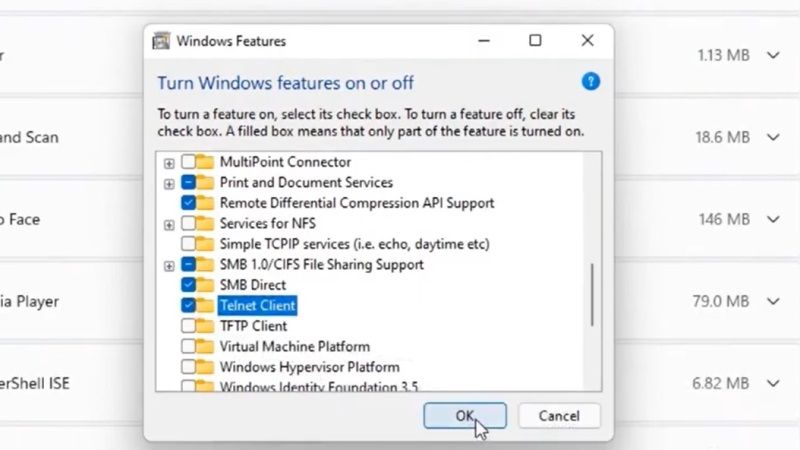
- Now, after opening Control Panel, click on Programs.
- Next, you need to click on the Turn Windows features on or off link.
- A window will pop up, here you need to scroll down and find Telnet Client from the available list. Just check the Telnet Client and click on ok.
- That’s it, this is how to enable Telnet in Windows 11.
How to install Telnet client using DISM on Windows 11
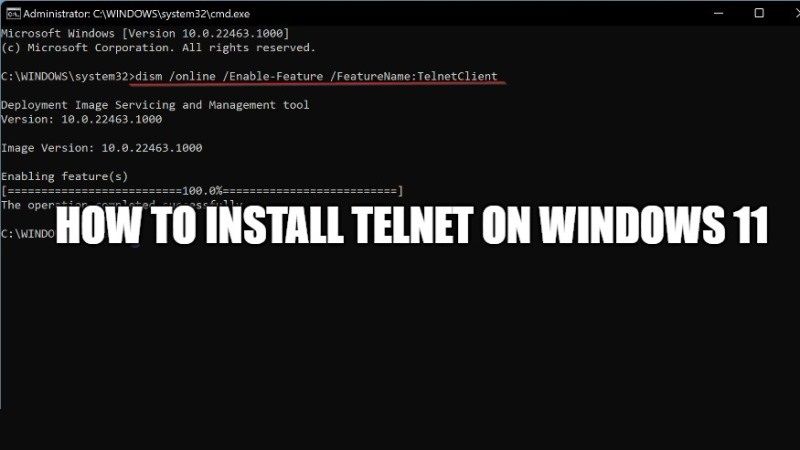
You can also install the Telnet client easily on your Windows 11 by using the DISM command-line tool. Follow the steps given below for installing Telnet client using DISM.
- Click on the Start menu and then type CMD and open it with admin rights.
- In the same command prompt, type the following command and press Enter key:
dism /online /Enable-Feature /FeatureName:TelnetClient
- Once the process is finished, you will then get an option to restart your Windows 11 computer, simply press the “Y” button on your keyboard.
- That’s it. The Telnet client will be now installed on your Windows 11 computer.
That is everything you need to know about how to enable Telnet Client in Windows 11. If you want to know more information about Windows 11 Troubleshooting steps, follow our other Windows 11 Guides right now.