With the launch of Windows 11, Microsoft will make it mandatory to use a motherboard with an integrated TPM 2.0 chip. To install Hyper-V on Windows 11 it is essential to activate the Secure Boot and TPM chip. In the case of Hyper-V, it is essential to use a “Generation 2” virtual machine; otherwise, Windows 11 cannot be installed. In this article, I will explain how to install Hyper-V on Windows 11 at ease, follow the step-by-step method given below.
How to install Hyper-V on Windows 11 Home (2023)
First of all, you need to make sure that Hardware Virtualization is enabled in Windows 11, to do that follow the below steps.
Here’s how to enable Hardware Virtualization in Windows 11
- Turn off your PC. Once the computer has shut down completely, power it on again and boot to the BIOS menu. To access the BIOS menu, you will have to search the internet to get an idea about which key is used on your motherboard to access the BIOS menu.
- Once in BIOS, go to the Advanced tab and search for Device Configurations.
- In the same configurations section, you will be able to see Virtualization Technology (VTx) option, just enable it.
- Press the F10 key on your keyboard to save the changes.
- Finally, restart your PC again.
After you have enabled hardware virtualization on your computer, the next step involves you to enable Hyper-V in Windows 11 to install multiple Operating Systems on your PC.
Here’s how to install Hyper-V on Windows 11 Home
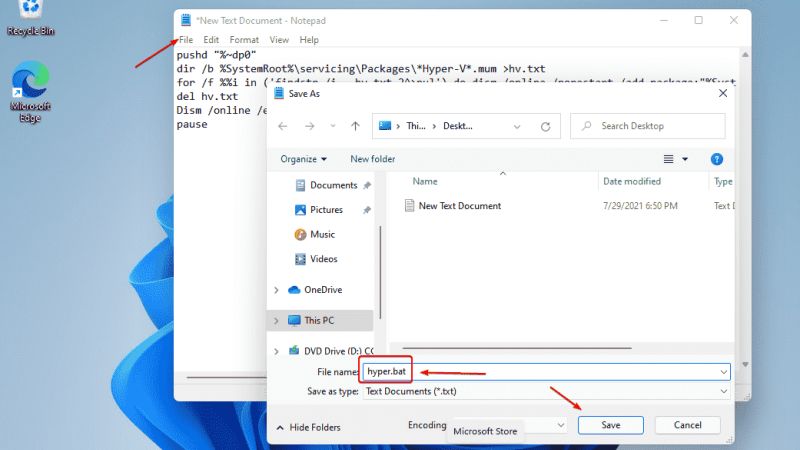
- Right-click on your desktop in an open space, and then open Notepad.
- Simply copy and paste the below command into the Notepad:
pushd “%~dp0”
dir /b %SystemRoot%\servicing\Packages\*Hyper-V*.mum >hv.txt
for /f %%i in (‘findstr /i . hv.txt 2^>nul’) do dism /online /norestart /add-package:”%SystemRoot%\servicing\Packages\%%i”
del hv.txt
Dism /online /enable-feature /featurename:Microsoft-Hyper-V -All /LimitAccess /ALL
pause
- Download the hv.bat file if you are facing any issues with the above code.
- After that save the Notepad file with the “hv.bat” name without quotes on your desktop.
- After saving the file, just right-click on it and choose to Run as administrator.
- The process will take a couple of minutes to complete and once it is done you need to restart your PC.
- After your computer restarts, you can find Hyper-V automatically installed and you can search it in the Start menu. It will be called Hyper-V Manager.
That is all you need to know how to install Hyper-V on Windows 11. If you are looking for more tips and tricks for Windows 11, check out our complete Windows 11 Guides for more information.