Connecting printers to your computer is a must as it becomes easy for you to take printouts from your device. This also removes the task of setting up your printer again and again when you want to take out printouts. So, today in this guide I am going to explain how to install an HP printer on your Windows 10 computer.
Steps to Install an HP printer on Windows 10
You can install the HP printer drivers on your Windows 10 computer in two ways. Both the methods are discussed below in detail.
Install an HP Printer Using USB Cable
If you have bought an HP printer that is not a wireless printer or your wireless printer’s connectivity is not working properly then you can connect it with a USB cable that is provided with your printer by following these simple steps:
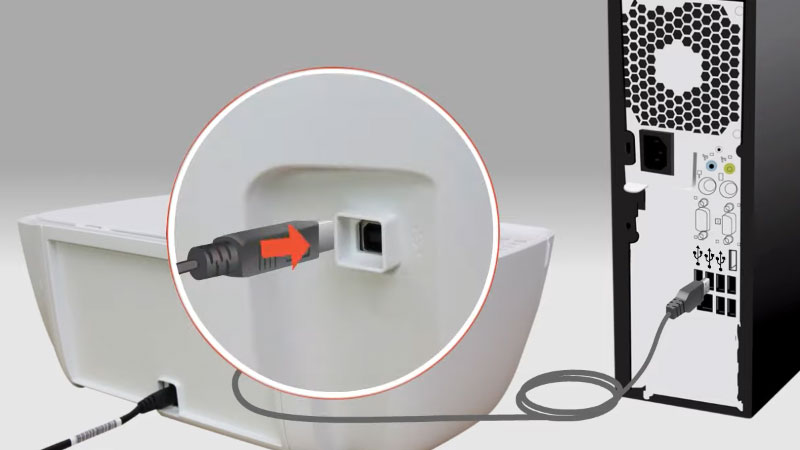
- First of all, disconnect the USB cable from the Printer (if in case you have connected the USB).
- Now on your computer, search for “Change device installation settings” and click on the first result.
- In the next dialogue box, click on “Yes” to allow Windows to automatically install driver software.
- Now, connect the USB cable’s square end to the printer and the flat end to your computer.
- This will pop up a message showing your printer name.
- Now, follow the on-screen instructions to set up your printer.
- Now, you have successfully installed your HP printer on your Windows 10 PC.
Install an HP Printer Using Wireless Connectivity
If you want to install HP wireless printer drivers that have a touch screen then you can install the drivers by following this workaround:
- First, disconnect the USB cable from your Printer.
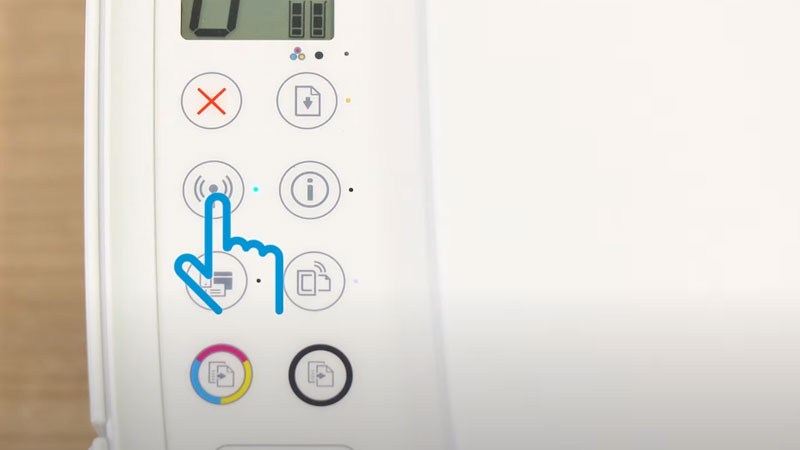
- Now, press and hold the “Wireless” button on your printer’s control panel till the network icon is blinking on your screen.
- On your router, press and hold the “WPS” button till the blinking of the network icon on your router.
- Now on your printer, type the Wi-Fi password to connect your printer to your Wi-fi connection.
- After this, connect your computer to the same Wi-Fi.
- If you are using a non-touchscreen display printer then press and hold the “Wireless” button and the “i” ( Information) button or the “Start Copy Black” button (a button that has white, grey, and black shades on it).
- This will print the network details of your HP printer.
- Now, search and select the control panel in the start menu and select “Add a Printer” under the “Devices and Printer” section.
- In the next dialogue box, select “The printer I want isn’t listed” and select “Add a printer using TCP/IP address or Hostname“.
- In the next dialogue box, type the IP address of your printer and click on Next.
- Wait till you see your printer’s name on your screen and click on it when it appears.
By doing this, you have successfully installed your HP printer on your Windows 10 device. You can also install your HP printer using the HP Smart App. For this, you need to install HP smart app on your computer and then follow in-app instructions to install your HP printer.
This is all you need to know about how to install an HP printer on your Windows 10 computer. If you want to connect your HP printer to your iPad then here is a guide on How to Connect HP LaserJet Tank Printer to the iPad.