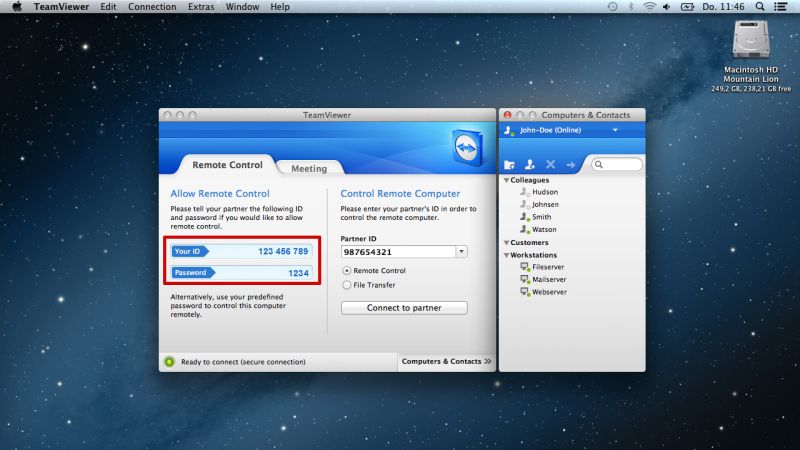
As you all know, TeamViewer is a multi-platform remote control software developed by a German company. Its purpose is pretty simple: to allow remote control of one device, using another. This software will allow you to access the entire system remotely and use it as it was in front of your eyes. TeamViewer offers the ability to manage and work on a cross platform from PC to PC, from PC to Mac, from Mac to PC, from Mac to Mac, from mobile to PC/Mac and vice versa, and mobile devices that support Windows, Linux, Chrome OS, iOS, Android, Windows, and BlackBerry platforms. In this article, we will see together how to use TeamViewer for Mac, and download and install it, and how it works.
What does TeamViewer do and how does it work and how to use it?

TeamViewer works on anything and everything, covering a wide range of devices and operating systems, ranging from systems with the most advanced software, to older devices and operating systems. This program is completely compatible with Windows, macOS, Linux, Chrome OS and even Android, iOS. That is why, computers running completely different operating systems can be accessed remotely and even from mobile devices.
How to download and install TeamViewer for Mac
TeamViewer is compatible with most operating systems, as we said above. The download of the Mac versions must be done from the TeamViewer site. Just go to this address and proceed to choose the Mac version of the software (you will be offered the one suitable for the computer from which you logged in). At that point you will have the possibility to download the file to install. To install the Mac version of TeamViewer, follow the steps given below:
- Select “TeamViewer” from the “download” menu of the site, select “Mac” and click on “Download TeamViewer”. At the time of writing the latest version is TeamViewer 15 (TeamViewer 15.28.8 to be precise)
- At the end of the download, double click on the TeamViewer.dmg file.
- The virtual volume that allows you to install the program opens.
- Double click on “Install TeamViewer” to start the automatic procedure that guides you through the installation steps. Just click on “Continue”, click on “Accept” to accept the terms of the license and then click “Install”.
- After entering the computer user’s password, the application is installed, the program will be copied to the “Applications” folder and run automatically.
From now on, you can open TeamViewer whenever you want from the “Applications” folder. The window that appears shows an ID and password. The ID always remains the same, while the password changes after each boot. These two parameters (ID and password) are those to be shared with someone to allow remote connection. Conversely, if we want to control someone’s computer or other device, we should indicate in the section on the right of the main window (“control remote computer”) someone else’s ID, his password and click on “Connect”.
That is everything you need to know about how to use TeamViewer for Mac. While you are here, you might be also interested to check out our other guides like How to Capture Screen using Print Screen on Mac, and How To Mirror MacBook To TV With or Without Apple TV.
