Windows 11 is installed in one of the spaces in your PC/Laptop hard drive, which is called a partition. You can always create multiple partitions breaking the entire hardware space into GB’s. Now consider a scenario where you have installed a new SSD or NVM or one of your system’s partitions has huge space. The default space where Windows is installed is full or has some issues. So how do you migrate Windows 11 from one partition to another without breaking down your system? Well, this can be done easily with tools like EaseUS Partition Master or with the Windows System Image tool. Both are free ways to move Windows 11 from one drive to another.
Move Windows 11 to a new drive or partition using Windows System Image
Windows System image is created by the Windows Backup & Restore app. This app requires a Pen Drive which creates a clone of your C: drive (system partition). It then helps you to install the same files to the new location.
- Connect an empty and formatted Pen drive to your PC. exFAT or NTFS will work.
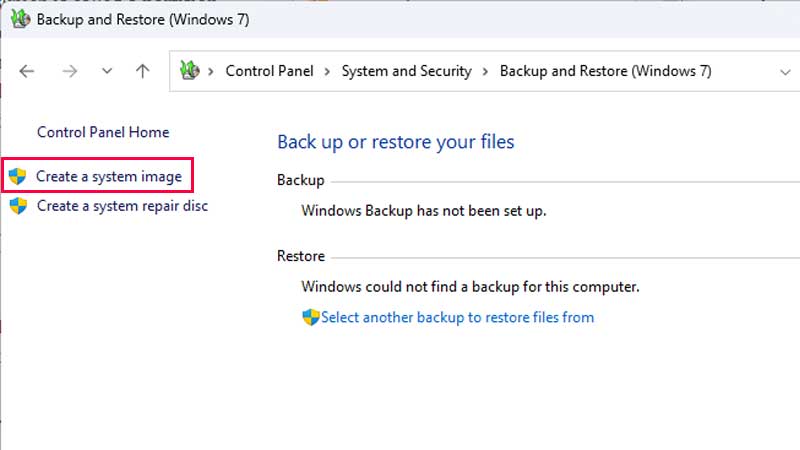
- Open Control Panel > System Security > Backup & Restore.
- Click on System Image from the left side.
The tool will ask you where you want to save the backup. From the drop-down select the USB drive. And then click on Next. From this screen, pick the (C:) (System) which has Windows 11 installed. This can be different in your system but look for (System) in bracket. Once you are done with these steps follow the below one.
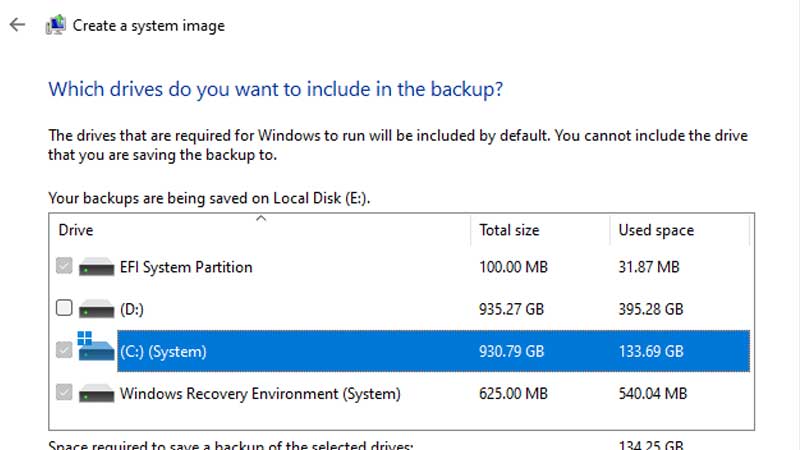
Click on Next and you will see the tool has selected a few more options other than the System partition. It can be an EFI System partition and Windows Recovery Environment. In short, the tool will select all necessary partitions that are required to run Windows 11. As it is creating a clone of the operating system. Finally, click on Start Backup and wait for a few minutes. Once it is done the next most important step is to create a recovery Drive.
How To Create Windows 11 Recovery Drive?
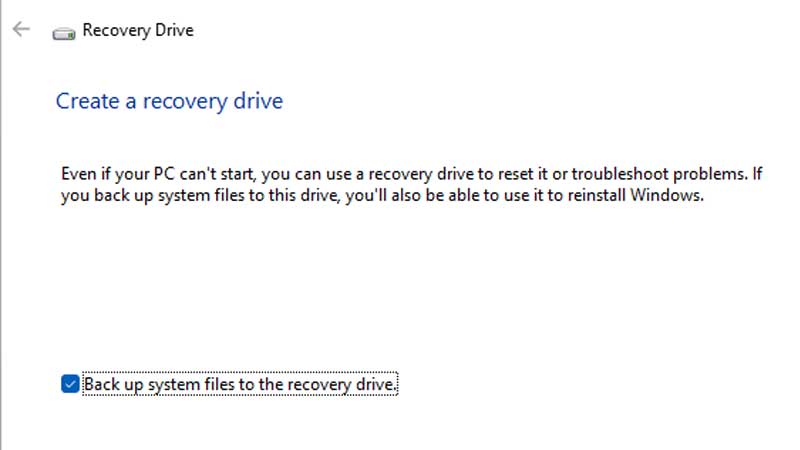
You can use the same USB drive to create a Recovery Drive, which already has a Windows 11 clone in it.
- In Windows 11 Search bar type Recovery Drive.
- Add a tick on “Back up system files to the recovery drive” and click on Next.
- The Recovery Drive will look for the USB/Pen Drive.
- Click on Next to finish the process.
Now we will start with the Windows 11 Migration process. This will take time, and make sure you backup your data and everything before doing this.
Connect the USB drive first.
- Click on Start > Click on the tiny Power Icon on the bottom left.
- Restart your PC or Laptop and press F2 or F10 to boot from the USB Drive.
- Click on System Image Recovery, it will scan for system clone in the pen drive.
- After selecting the latest system image, click on Next.
- Remove the tick from the Format & Repartition disk.
- Click on Next and select the partition where you want to move Windows 11.
- Follow the screen instructions and click on Next to finish the step.
Windows System Image will take some time to install the same OS to the new drive. After this, there can be one problem. You might see Two Windows on the Boot Screen. One is the old one, and the second is the new one that is moved to a new partition. If this happens then follow the below steps.
- Let your PC boot and press Windows + R.
- Type msconfig and click on Ok
- Go to Boot and there you will see multiple entries of Windows 11 with its location.
- Just click on the new one and click Set as default.
Restart your PC and check once, this may resolve the issue of dual boot.
Risk Involved in Migrating Windows 11 to a new Drive or Partition
Before we start with the process let’s check out some risks that are involved in this migration process. As Windows 11 is the operating system, wrong or improper migration will crash the OS. Your system might give you a Blue Screen on boot or it may fail to start. So here are things you must not do during the Windows 11 Migration process.
- Do not turn off your system.
- Use original, licensed software.
- Chances you might get a Dual Boot screen after boot.
- This migration process involves cloning, so make sure you have enough space in the new partition of the drive.
- Always format and check the drive or partition whether it’s active or not.
- After formatting mark the partition or drive as primary partition.
- You can re-format the location using EaseUS Partition Master.
- For laptops, you will have a System Recovery option to restore in case of issues.
- If you are using an old PC or Laptop, keep all the necessary drivers ready.