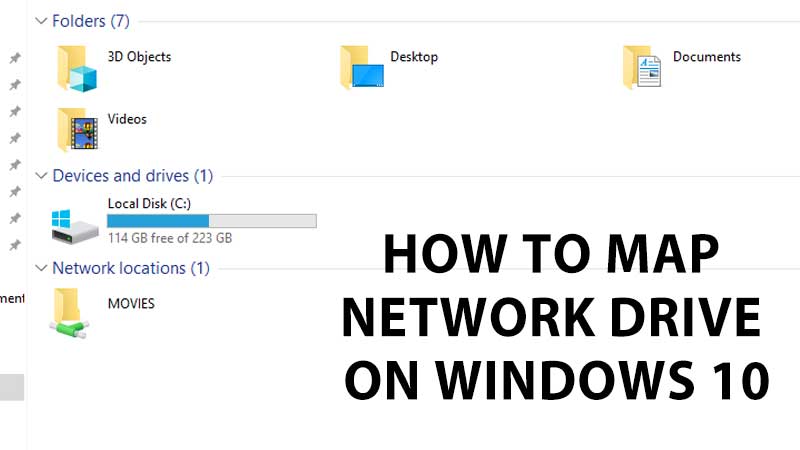
Accessing shared folders on Network is confusing and time-consuming. Sometimes the folder is not visible, while sometimes you cannot remember the exact location of the shared folder. So what’s the best solution to access shared folders on the Windows network. Well, you can permanently map the drive and open it just by double-clicking on it. You Map multiple folders on Windows 10, and once it is attached to your system it does not disappear unless you delete it. And do not worry about deleting a Mapped Network drive from Windows 10 This PC does not means it will delete the actual folder.
In this guide, I will help you with the three steps process on how to map a network drive in Windows 10.
- Step 1: Share a Folder on Remote or Network PC.
- Step 2: Note down the Location of the Shared Folder.
- Step 3: Map the drive on your system.
Share a Folder for Mapping Purpose
We will begin with Windows 10 folder sharing first. A process to create shared space on Windows 10 LAN network. If you are having multiple PC in your home or office and they all are connected to a single network you can share one of the folders and access them with ease. For example one of the PCs or Laptops on the same network has a “Movies” folder. Here is how to share it.
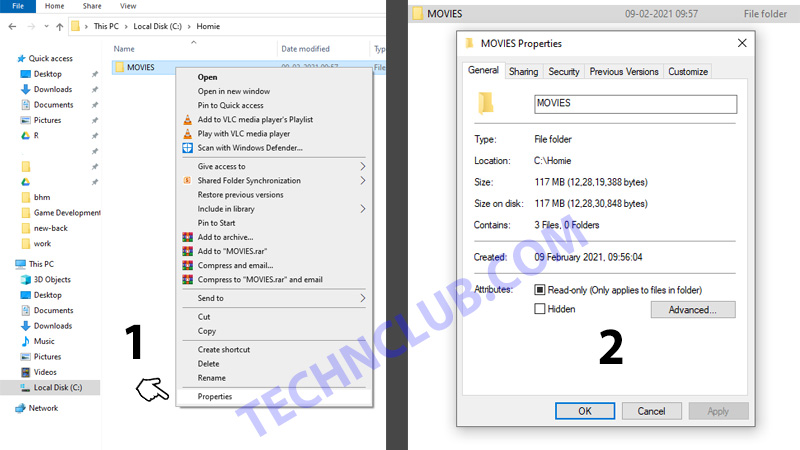
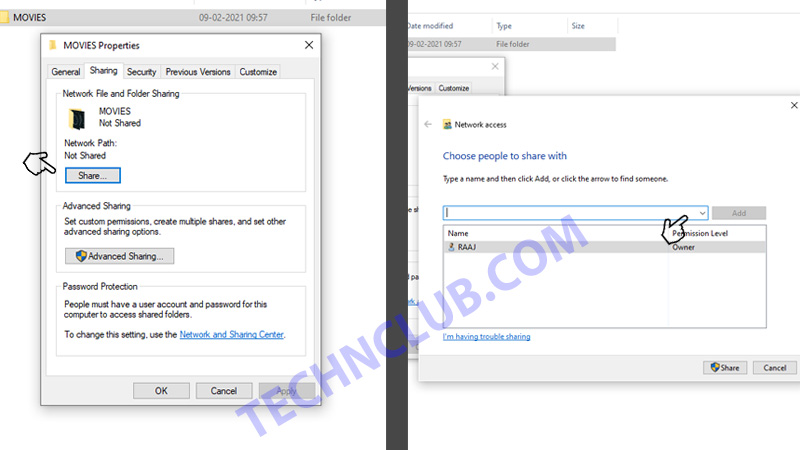
- Right-click on the folder and click on Properties. Remove the Read-only Tick and then click on Sharing Tab.
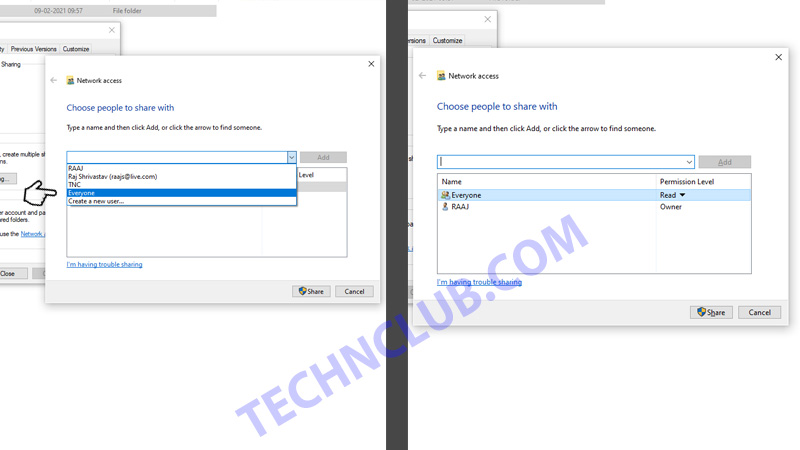
- Click on Share Button and choose Everyone from the arrows towards the right before add button.
- Right-click on the folder and click on Properties. Remove the Read-only Tick and then click on Sharing Tab.
- Click on Share Button and choose Everyone from the arrows towards the right before add button.
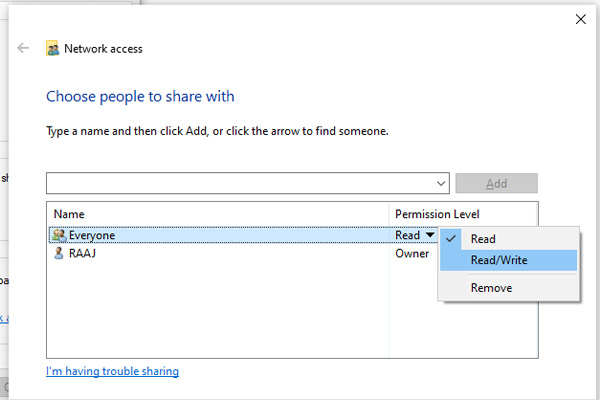
- Read Permission allows all users on LAN only to access the files. Read/Write will allow all to delete or add files in the folder. If you do not want others to change files in the folder choose Read.
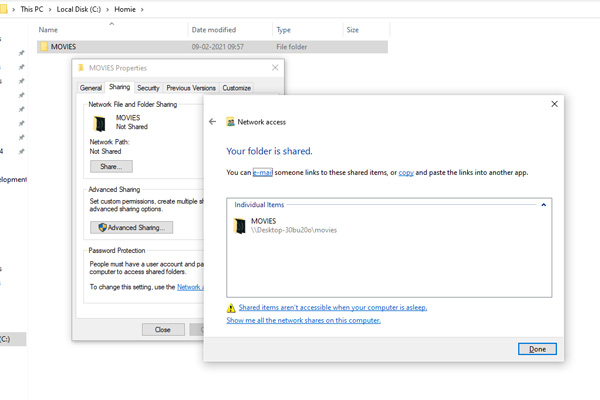
- That’s it click on the Done and then the Close button to exit this part.
You have now shared the folder on Windows 10 LAN. This folder will be accessible to all users who are on the same LAN network. Our next goal is to note down the folder location for mapping purposes.
How to find Shared Folder Location on Windows 10 LAN?
We will have to find the exact location of a shared folder on the LAN network. This location will be used to Map the folder permanently which will remain visible on this PC. You will not face any issue while accessing it. Here is what you have to do to find the location of a shared folder on Windows 10. There are two ways to find shared folder location. One directly through the source PC where you had shared the folder and one via any other system on the same LAN Network.
Shared Folder Location via Source PC:

Right-click on This PC > Properties > Note down the name of the system. Look next to the Computer Name and note down the same. Go to this PC > “Shared Folder” and double click the folder. Copy the Folder Location from the top address bar. Just copy-paste this in the Name of PC + Address of Folder in any other system to directly access the folder.
Shared Folder Location via Any PC:
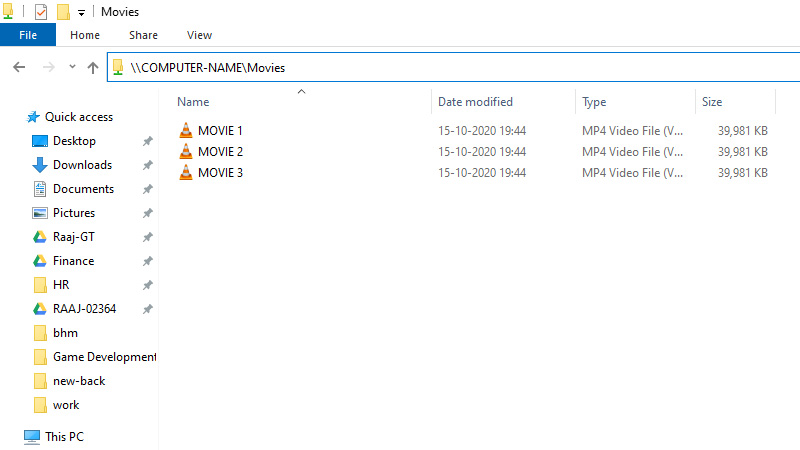
Go to this PC > Network > “Computer Name” and double click the folder. The objective here is to find the exact location of the shared folder. So that you can use it to Map network drive. Here is what you will find by following any of the above two steps.
\\COMPUTER-NAME\Movies
How to Map a Network Drive?
The next task is to map the network drive. Once you have the address of the shared folder follow the below steps to map this drive permanently to your Windows 10 Laptop or PC.
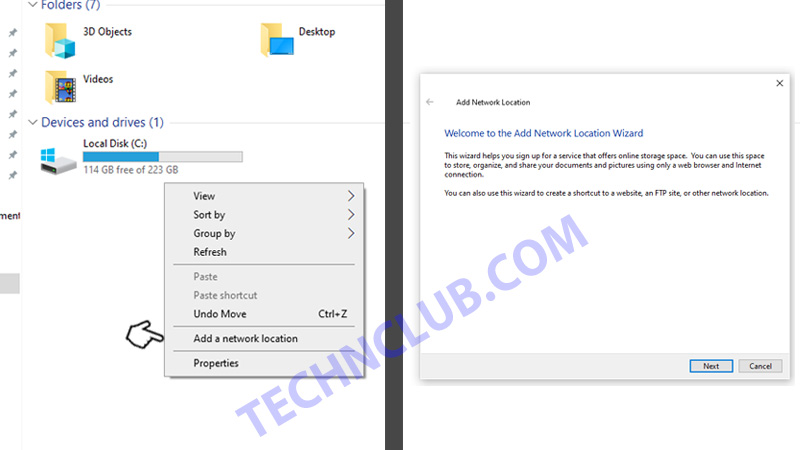
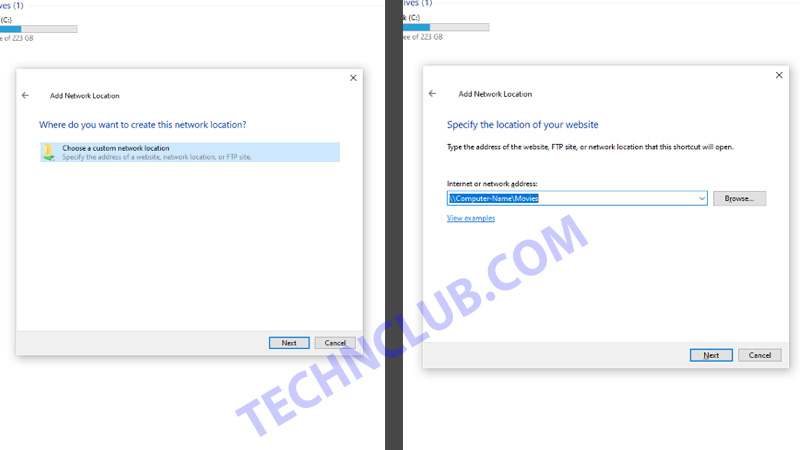
- Open This PC and right-click on the white area.
- Click on Add a Network Location.
- Click on Choose a custom network location.
- Copy-paste the address of the shared folder.
- Type a Name for the Map Drive and click on Next.
- Click on Finish.
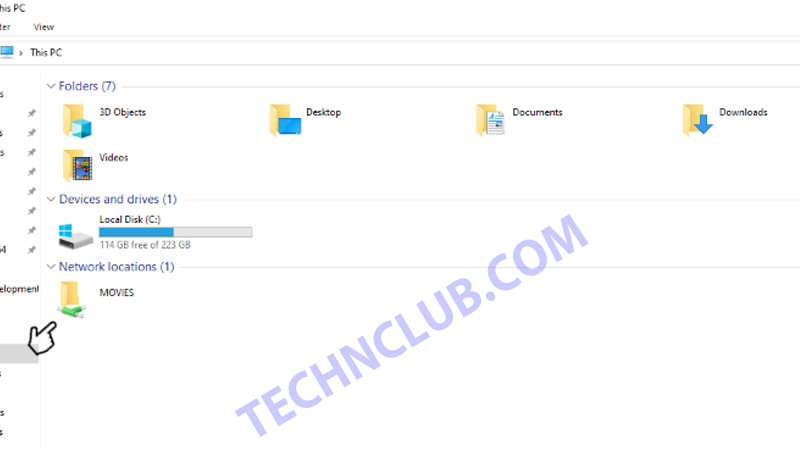
That’s it, the shared folder is now permanently connected to your system. Next time whenever you have to access it go to This PC and double click on the Shared Folder. You can view files directly without locating them on the LAN network. It is one of the quickest ways to share files among different users on the same network in a home or office environment.