In 2023, social media platforms like Facebook can be a great way to connect with people. But what happens when you’ve had enough of it? There might come a time when you feel like simply deactivating Facebook on your phone and taking a break. If you use an iPhone and have been wondering what to do to deactivate Facebook, we’ve just the guide for you!
How To Disable Facebook on iPhone?
Facebook account can be deactivated via Facebook App. After deactivation, your friends will still be able to see you in their friend list. They can still view your conversations and you can still use FB Messenger. But if you want to complete wipe out everything then you have to Delete your Facebook Account. This guide is only for Deactivating or Disabling FB accounts if needed.
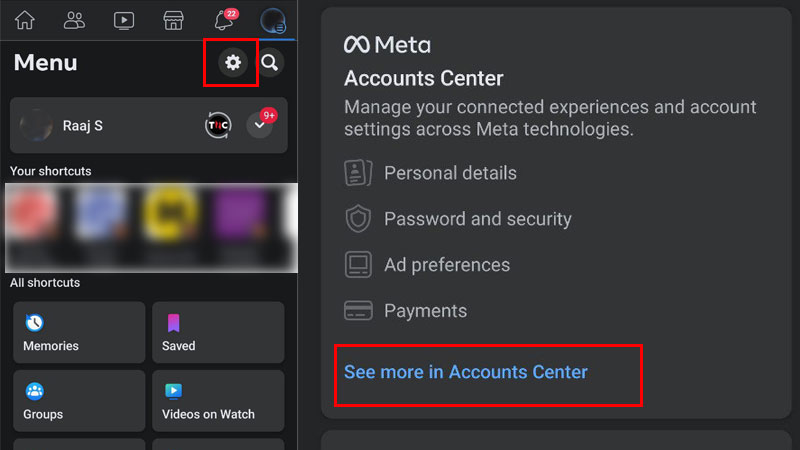
Launch FB App and tap on Settings in the Top right corner before the Search icon. Then tap on Account Center to access more settings.
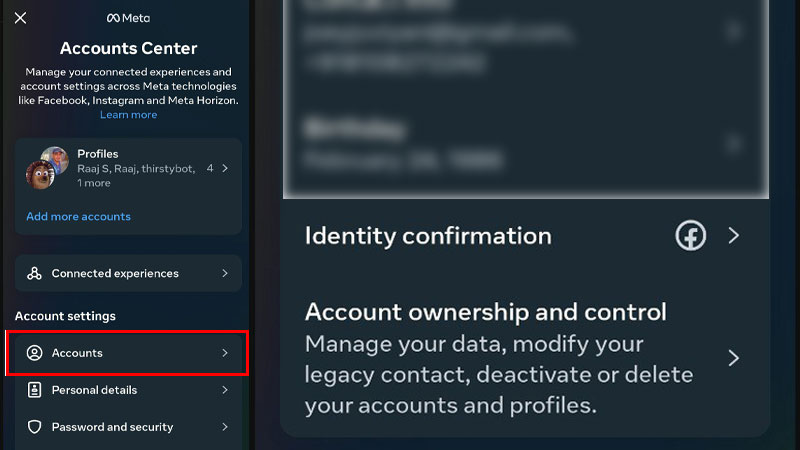
Tap on Accounts and then Tap on Account Ownership and Control button. This will take you to a page with three options: Memorialization, Deactivation or Deletion, and Reactivation.
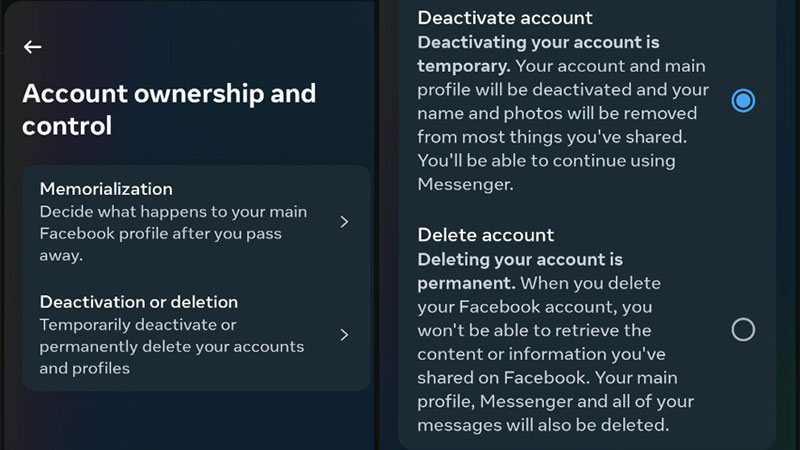
Click on Deactivation or Deletion. This will show you your active Facebook and Instagram accounts on your iPhone. Click on the Facebook account you wish to deactivate. You will be taken to a page that offers you the choice to either temporarily deactivate your Facebook account or delete your account.
Choose the relevant option and click on The Facebook app will then warn you about the deactivation of pages or profiles linked to the account you wish to deactivate. This includes pages that you may be the only admin or have complete control of. You will also be shown the pages that will be deactivated, should you choose to continue. If you’re fine with deactivating pages or profiles linked to the selected Facebook account on your iPhone, click on Continue. Next, you will be asked to re-enter your Facebook password to proceed with the deactivation process.
After you enter your password and click Continue, you will need to state your reason for deactivating your Facebook account. You need to do so from a preset list of options. With the desired option selected, press Continue. Repeat this step for the next page too. Before you complete the process, you will find one last page. Scroll to the bottom and click on the Deactivate my account On this page, you will also be able to choose preferences with regards to notifications for the account you want to deactivate. And that’s it. With a few simple steps, you too will be able to deactivate your Facebook account on an iPhone.
The advantage of deactivating your Facebook account is that you always have the option to reactivate it whenever you want to. Unlike deleting your account, deactivation is simply temporary. With Facebook now deactivated, how about you look at our guide on How to Restore Recently Deleted Messages on iPhone 14?