Watching any movie, web series, songs, or it can be normal video, obviously with one of the best media players like VLC is having a great experience. And you can pump up the experience by modifying the player’s skin. It is extremely easy to change VLC Skins and in this article, you will learn about the same.
How to Change VLC Media Player Skin?
You can download whichever skin you like from the VLC media player skin library for free of cost. After downloading it the file will be saved in downloads.

Step 1
Search for the skin or you can just randomly download cool skins for the VLC media player from the library. Press “Windows Key + R” and type “C:\Program Files\VideoLAN\VLC” and paste your downloaded skin in the VLC folder.
Step 2
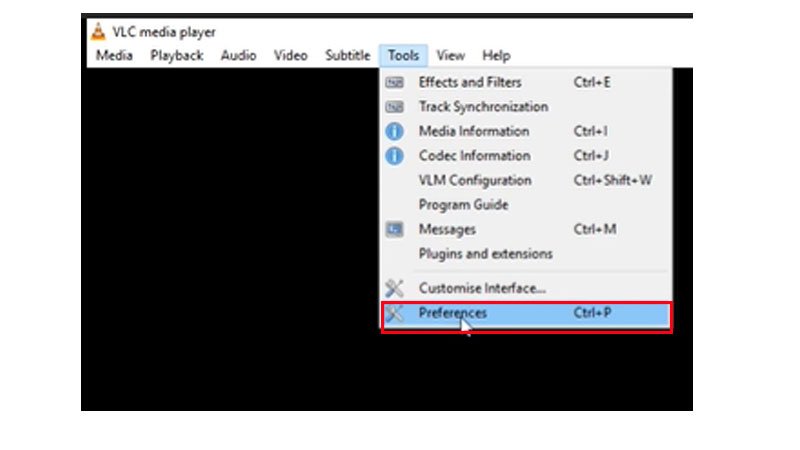
Close your tab and open the VLC media player, at the top of the Media player menu, you have to Click on Tool, a dropdown menu will fall under the Tool section. From the dropdown menu, click on Preferences.

Step 4
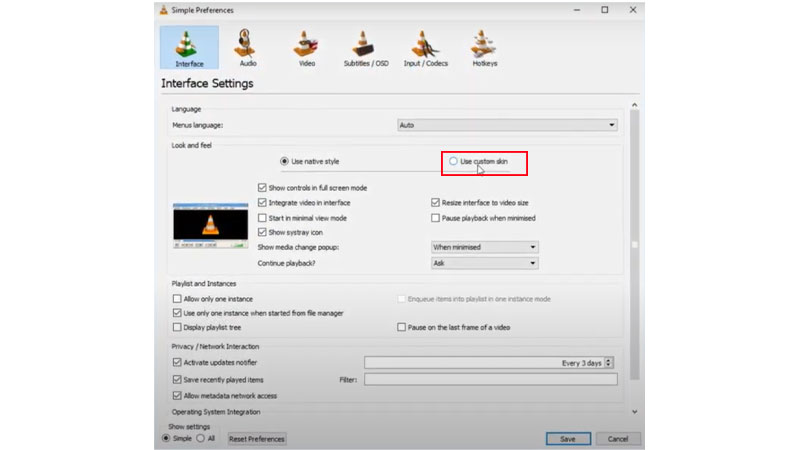
A new table with Simple Preferences named-new tab will pop up on the screen. Go under the “look and feel” section there will be two options 1) Use Native Style and 2) Use Custom Skin. You have just clicked on the circle beside “Use Custom Skin”.

Step 5
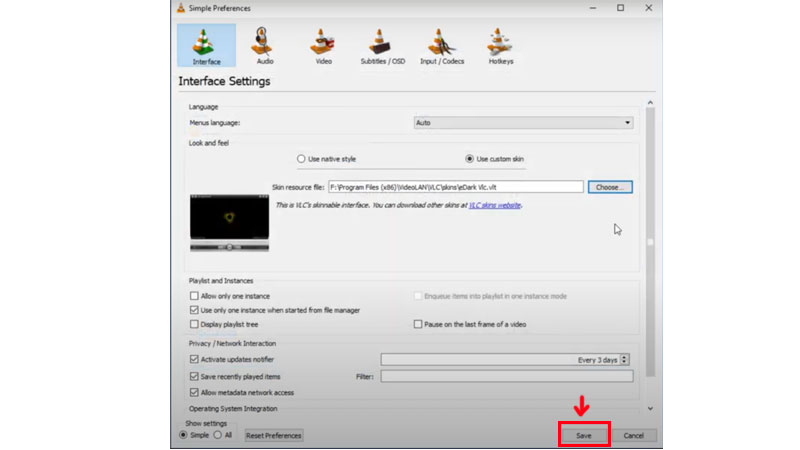
Once you choose that option, it will ask you to choose a file of the VLC media player skin, which we have downloaded from the VLC media player skin library. Click on Save.

Step 6
Close the VLC media player and start it again, you will notice that your VLC media is changed fully compared to the previous VLC media player.
You will find a variation in VLC media player skins on the default library. There are many other sites also which provide the same I will advise you to stick with the official one. Enjoy customizing VLC with some amazing skins.
