Do you want to make your Windows 11 Taskbar look simpler and look more minimalist? Well, you can now remove some parts that are likely not used often on the Win 11 Taskbar. For example, if you do not want to use the Search / Windows Search bar button because it is already available by default in the Start Menu when you click on it. In this mini-guide, let us find out how to hide and unhide the Search button on the Windows 11 Taskbar.
How to Hide and Unhide the Search Button on the Windows 11 Taskbar

You can easily Turn Off the Search Button in Windows 11 quickly by following the steps given below.
- First of all, right-click on Start and then click on Settings to open the Settings app.
- At the left side pane, click on Personalization.
- Then on the right side, click on Taskbar.
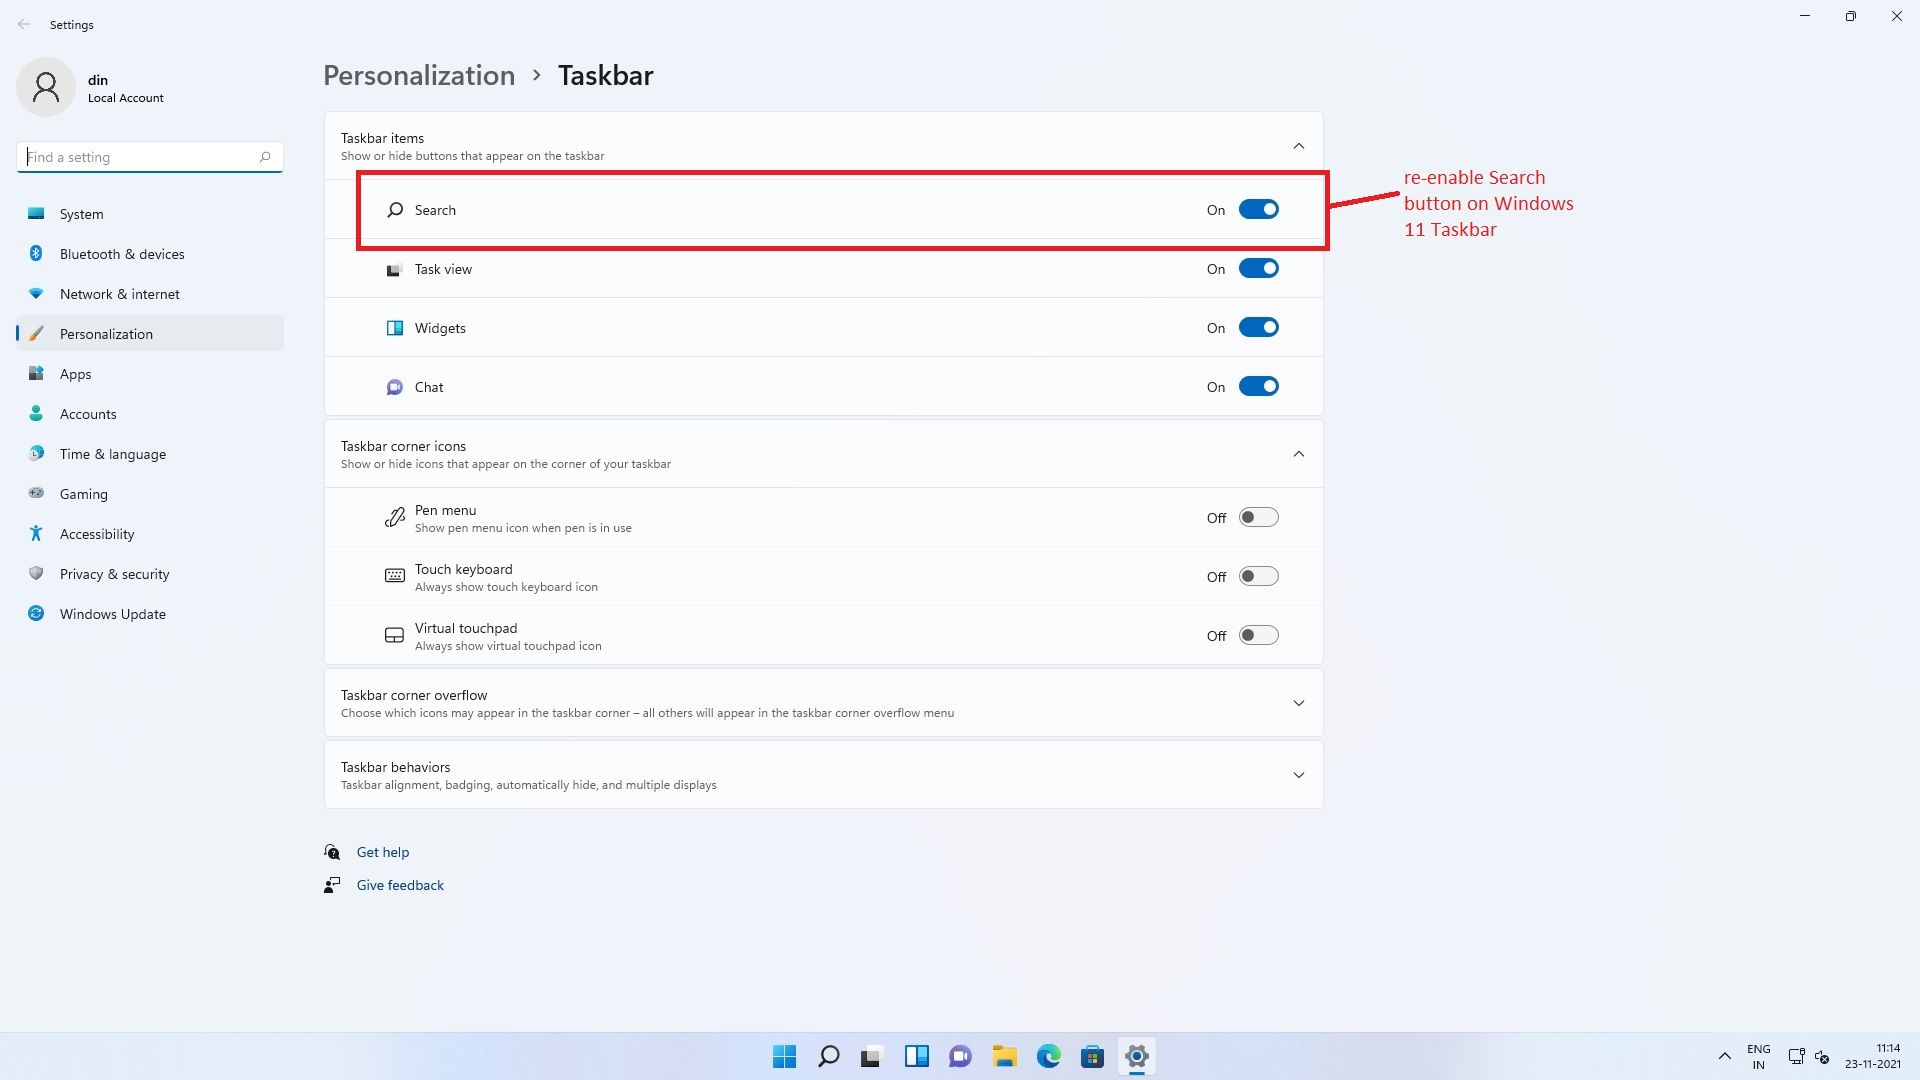
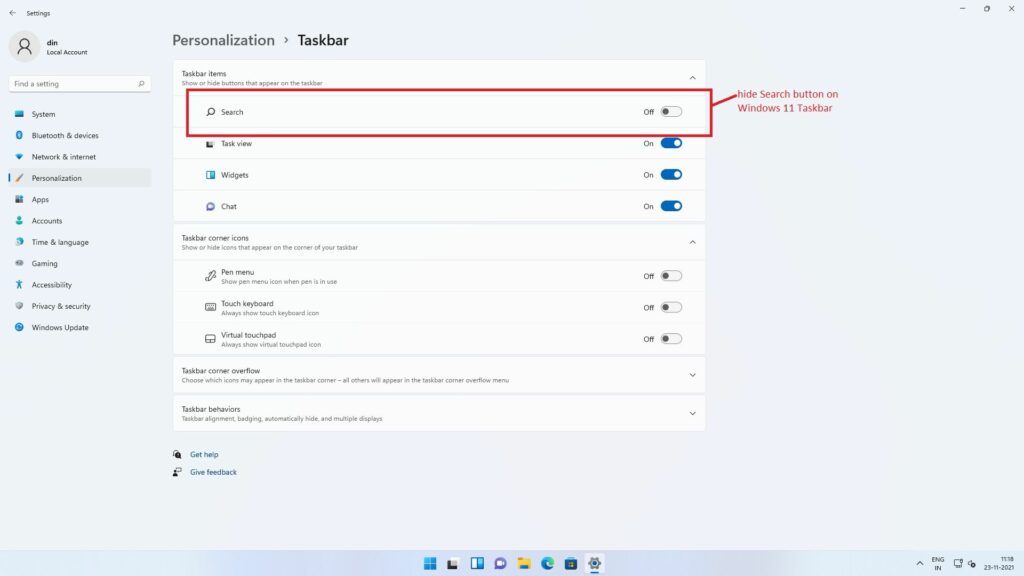
- Under the Taskbar Items, there is a Search option. Just click on its Toggle button and drag it to the left side to disable it or set it to Off on the Toggle button.
- That’s it, the Search button in the Taskbar will now be hidden on your Windows 11 PC.
How to Turn On Search Button on Windows 11 Taskbar
There is another shortcut method to enable or unhide the Search button on Windows 11 Taskbar, follow the steps given below on how to do that.
- To re-enable the Search button on Windows 11 Taskbar, simply right-click on the taskbar and select “Taskbar Settings.”
- A new window will pop up, here under the Taskbar Items, you will see the Search option at the top.
- Simply drag the Toggle button to the right side next to the Search option to turn it on.
- That’s it, the Search button will be back again on your Windows 11 Taskbar.
That is all you need to know how to hide and unhide the Search Button on Windows 11 Taskbar. While you are here, you might be also interested to know how to download KB5007262 update to fix Windows 11 BSOD and App crash issues, and how to activate Windows 11 Style Menus in Google Chrome 96 and higher.
Here’s a video explaining how to enable or disable the Search Button on Windows 11 Taskbar:
https://youtu.be/L4ACqtSAX6w
