
If you are looking to customize your Windows 11 interface, the following tips should help you out. You might have noticed that whenever you boot your Windows 11 operating system, you will always see a dotted-circle animation circling around for some time until it boots to the login screen. Now, there is a trick to change this boot animation and make it look more progressive. In this guide, let us see together how to enable the new boot animation on Windows 11.
How to Activate the New Boot Animation in Windows 11
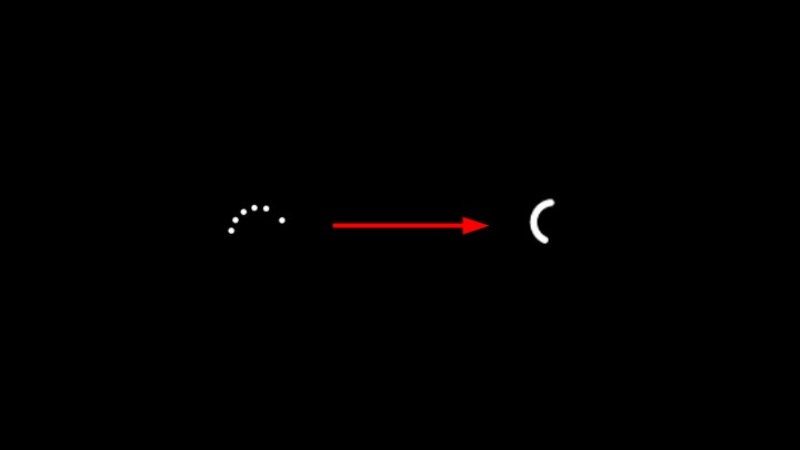
Whenever you boot or restart your computer with Windows 11, you may have certainly noticed the dotted-circle animation that appears briefly. Well, now you might be excited to know that there is a second alternative boot animation to the default one.
Microsoft has recently added a new secret boot animation starting with Windows 11 build 22449. But the problem is that this animation is disabled by default. Hence, you always see a dotted circle animation.
So, in order to enable this new boot animation when Windows 11 starts, all you have to do is make a small change in the Registry Editor and you are good to go on. This will give you a booting sequence with a progressive ring instead of the dotted circle.
Here’s how to enable Windows 11 new boot animation:
- First, you need to press Windows + R keys on the keyboard to open the Run dialog box.
- In the Run dialog box, type “Regedit” without quotes and then press Enter key.
- Now, in the Registry Editor window that pops up, you have to navigate to the following key:
Computer\HKEY_LOCAL_MACHINE\SYSTEM\ControlSet001\Control - After that right-click on the Control key and then select New > Key.
- Rename this new Key as “BootControl” without the quotes.
- On the right part of the window, you have to right-click and select New > 32-bit DWORD Value.
- Rename the new value to “BootProgressAnimation” without the quotes.
- Now you have to double click on the “BootProgressAnimation” value and in the “Value data” enter 1 and then click OK.
- Finally, you have to reboot your PC and you will find that the new animation is already there.
That is everything there is to know about how to enable the new boot animation in Windows 11. While you are here, you might be also interested to know how to How to Record Your Screen on Windows 11, and How to fix Windows 11 Not Detecting Second Monitor.