Cookies are packets of Data that save your Internet Browsing sessions on certain websites. They allow you to start from where left off on a Website. As such, having them active is helpful. But they can also be harmful by tracking your activity. As such, finding a balance between allowing a few of them is key. In this guide, I will show you how to Enable & Allow Cookies on your iPad.
How to Enable & Allow Cookies on your iPad?

To Enable & Allow Cookies on your iPad, you will have to change certain Browser settings for Safari & Chrome. The following steps given below will help you in achieving this task:
- First, go to your Home Screen and hit the Settings button.
- From there, scroll down till you find Safari.
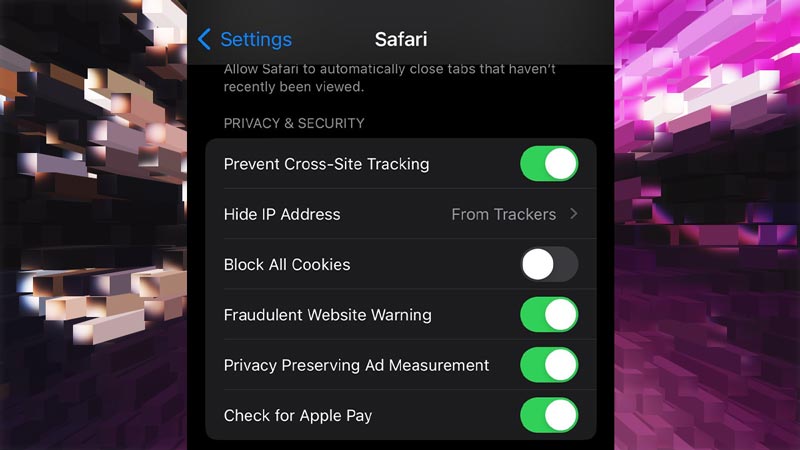
- Click on it & scroll down till you find the Privacy & Security section.
- Here is where you will find all of the Cookie-related Settings for Safari.
- Under this section, disable the Block All Cookies Settings.
- But do enable the other ones as it will keep your iPad safe from unsafe activity.
- After that, restart Safari, and Cookies for it will be enabled.
- If you want to Enable & Allow Cookies on your iPad for Chrome, you will have to do it through the Chrome App.
- Simply tap the More button for the option on your Chrome App.
- It will be the 3 dots button.
- From there go to Settings.
- Under that, there will be Cookies, Site Data.
- Click it and check if Cookies are allowed.
- If not then enable it.
This was all about how to Enable & Allow Cookies on your iPad for Chrome & Safari browsers. Hopefully, this guide has helped you. You can also check out our other guides like How To Connect Two AirPods To IPad & Is Rush Royale Removed From App Store? How To Download It On IPhone & IPad.
