
Safe Mode is a mode used by Windows when it boots up without any third-party app or programs installed on your computer. It starts your Windows 10 with the drivers and files that are required by your operating system. This mode is generally used to check whether the problem is caused by the system files or an app. After checking the issue with the system files and resolving it, if you want to exit this basic mode then here is a guide on how to disable Safe Mode in Windows 10.
Steps to Disable Safe Mode in Windows 10
As discussed above, Safe Mode does not allow other apps and programs to run on Windows 10. So, to access these apps and programs you need to first disable Safe Mode. You can exit Safe Mode by following the methods mentioned below.
Disable Safe Mode from the Start Menu in Windows 10
To exit or disable Safe Mode you need to simply restart your computer by following this workaround. This is the quickest method to exit Safe Mode in Windows 10.
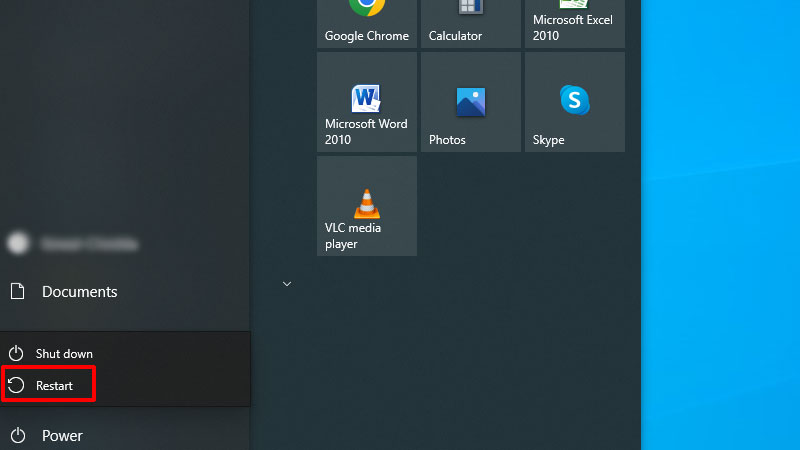
- Click on the “Windows Logo” to open the “Start Menu“.
- Now in the “Start Menu” click on the “Power” icon.
- In the pop-up menu click on “Restart“.
- This will restart your computer and now your Windows will boot in normal mode.
Disable Safe Mode Using Command Prompt
Here’s the next method you can use to exit Safe Mode:
- Press the “Windows + R” key together and type “CMD” in the search field and click on “OK“.
- Now in the “Command Prompt” type this command “deletevalue {default} safeboot” without quotes and press “Enter“.
- After this type this command “Exit” without quotes and press “Enter” key.
What to Do If Safe Mode is Not Disabled
If in case your computer boots up in Safe Mode after applying these tricks then to fix this issue follow this trick:
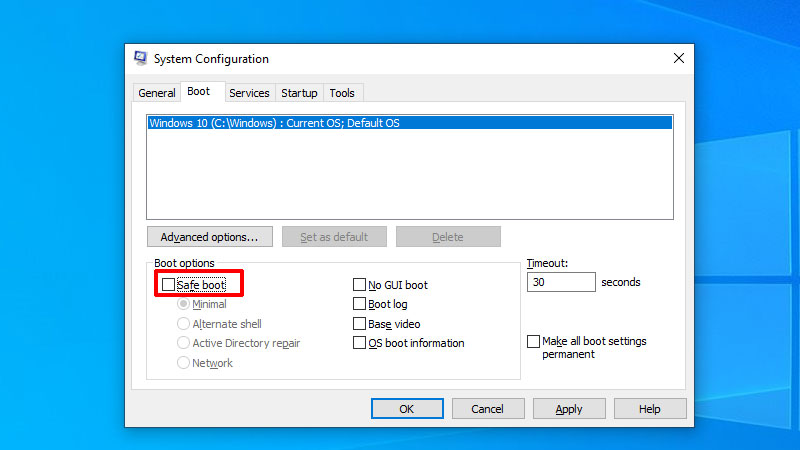
- Press the “Windows + R” shortcut keys to open the “Run” command.
- Now, in the “Run” command, type “msconfig” and press “Enter” key.
- In the next dialogue box click on the “Boot” section.
- In the “Boot” section, uncheck the box next to “Safe Mode” and then click on “OK“.
- By doing this, your computer will disable Safe Mode and boot back to normal mode.
This is all you need to know on how to disable Safe Mode in Windows 10. If you are facing blue screen errors on your computer then here is a guide on How to Troubleshoot and Fix Windows 10 Blue Screen (BSOD) Errors.