There are many users who come across interesting articles or web pages and they would like to take a screenshot of the image displayed on the screen. For Windows operating system users this task can be easier, but for new Mac system users, there may be some doubts. In any case, Macs comes with powerful tools to capture, crop, and resize an image in Mac Monterey. There is also no need to install any third-party application for the same. In this tutorial, I will explain how to crop a screenshot on Mac Monterey in a few simple steps.
How To Crop A Screenshot on Mac Monterey
There is a very simple method for cropping screenshots on Mac Monterey. However, the procedure that I am referring to is only useful for computers running Mac OS X 10.5 version or higher. In this guide, you will learn how to crop a photo on macOS 12. There are plenty of ways to do that, so follow the different methods given below.
Method 1: How to crop a screenshot in Mac Monterey using the Preview app
- First, take your favorite screenshot from any webpage or anywhere else and save it on your Mac Monterey system.
- Once saved, double-click on the screenshot to open it.
- The screenshot will open in the Preview app, which comes preinstalled.
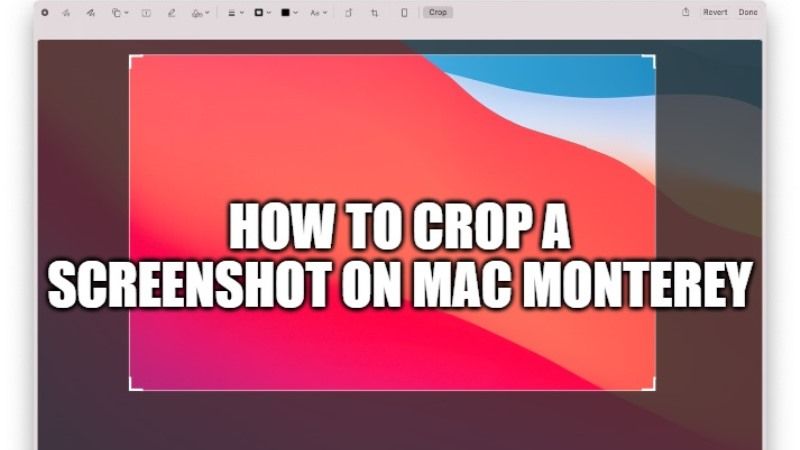
- On the top right side, before the Search button, click on Show Markup Toolbar.
- After that, you need to select the area in the screenshot that you want to crop.
- Once you have selected the area, just press the Command+K keys together to crop the screenshot.
- Finally, click on Save or press the Command+S button together to save the cropped picture you have taken.
- Done.
Method 2: Crop Screenshot in Mac Monterey from Photos App
- Open the preinstalled Photos app first on your Mac.
- Open the screenshot that you want to crop in the same app.
- On the top right side of the app, you need to click on the Edit button.
- Now, on the top menu bar, you have to click the Crop button.
- At this point, you can manually crop the screenshot or simply click on the Aspect option to choose different shapes or go with Custom cropping if you want.
- Finally, once the screenshot has been cropped according to your needs, just click on Save.
- Done.
And that is all you need to know about how to crop a photo on Mac Monterey. While you are here, do check out our other macOS Monterey Guides right now only on TechNClub.com.