As you might very well know, PDF files are used all over the world in ticketing systems or online forms, etc. However, there might some situations when you want to take a screenshot or different images in PNG, JPG, and other formats and change them to the portable document format. Therefore, in this guide, I will teach you how to convert or save a photo on your Mac system as a PDF file in detail below.
How to Convert and Save a Photo as a PDF File on Mac

If you want to learn how to convert and save a photo, which might be in JPG, PNG, or any other format, on your Mac computer as a PDF file, don’t worry, as we have got you covered. Below you will find all the methods on how to do that on your MacBook pretty easily:
Convert and Save Photo as PDF via the Preview app
- First, open the photo that you would like to export as a PDF file in the Photos app.
- Then click on File at the top Toolbar.
- In the drop-down menu, select Export > Export 1 Photo.
- Now we will export the photo as JPEG, and then click Export.
- You will get an option where to save it, then on the left side select Desktop, and then on the right side click Export.
- Then open up the exported photo from the desktop with the Preview app for the conversion process.
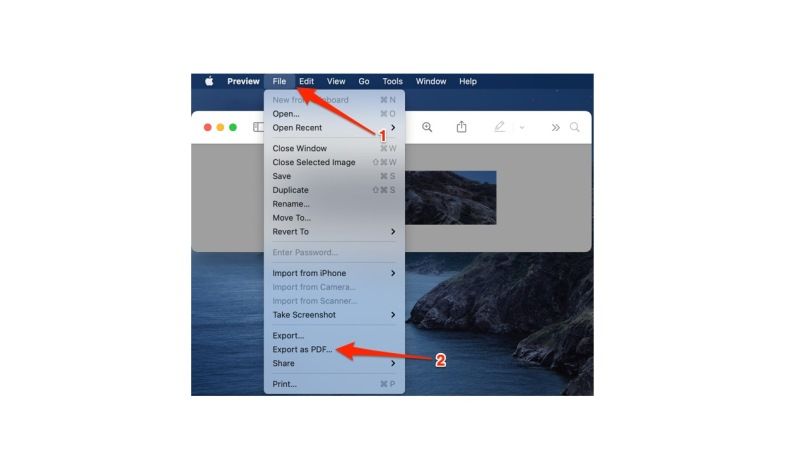
- On the top left corner, click File > Export as PDF.
- Finally, select the file name and location where you want to keep the PDF file, and then click on the Save button. That’s it, your photo will be now converted and saved into a PDF file in any location on your Mac.
That’s all there is to know about how to convert and save a photo as a PDF file on your Mac. If you are interested in more Mac Tips and Tricks, then check out our other guides on How to Turn On Incognito Mode on Mac, and How to Convert SVG to PNG on Mac.
