You can use your printer with many devices but the ease that you get while using it with your Windows 10 computer is unmatched. Though you may not be familiar with all the controls of your printer using your Windows 10 PC and it can be a bit problematic if your printer ever runs into an issue and you do not know how to fix it. One such common problem that many users face with their printers is an unresponsive spooler or printing queue. Are you unable to stop your printer from making copies? Or do you need to clear the tasks that you have given to your printer? Whatever it is, we will help you with this guide on how to clear the printer spooler or clear the print queue on Windows 10.
How to Clear Print Spooler on Windows 10 PC
Follow these steps to remove the print queue on your Windows 10 system:
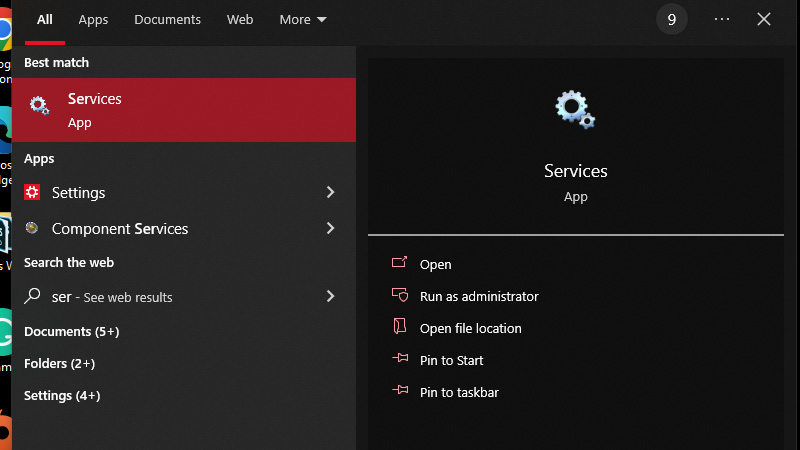
- From the Start Menu, search ‘Services’ and open the first search result.
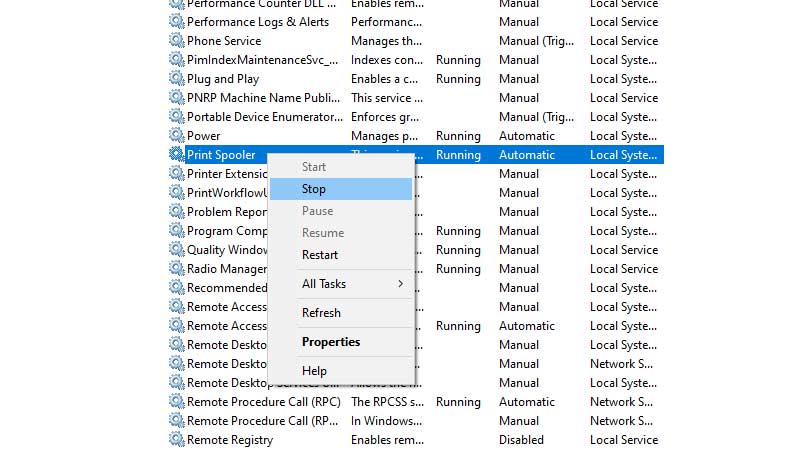
- Scroll down and look for ‘Print Spooler’.
- Right-click on it and select ‘Stop’.
- On your computer, go to this location – ‘C:\Windows\system32\spool\PRINTERS’.
(You must have administrator permissions for it).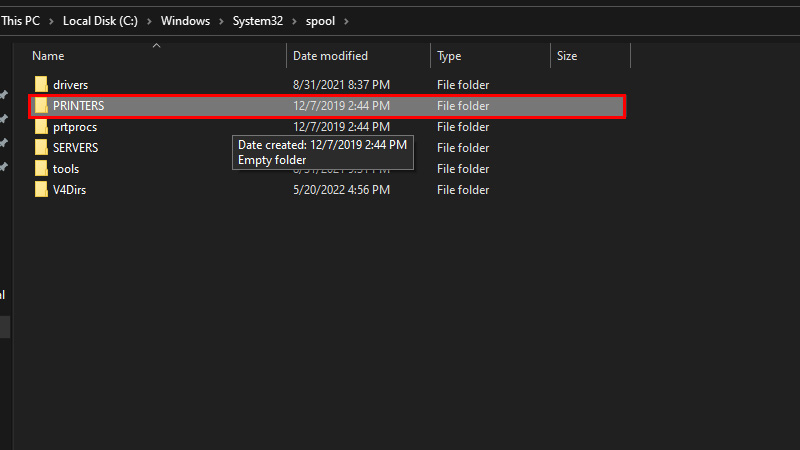
- Delete all the files in this folder/location.
- Open the ‘Services’ window again as explained in the first step.
- Right-click ‘Print Spooler’.
- Select ‘Start’.
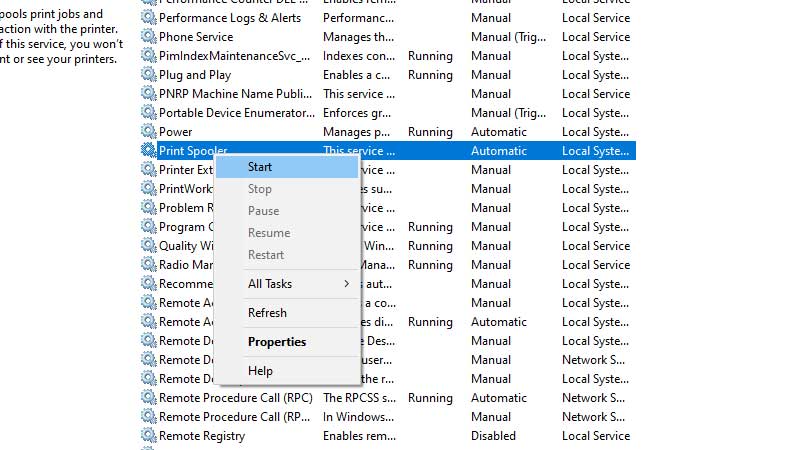
This way, you can clear the print queue and start it again on your Windows 10 PC.
So, these are the steps to clear the print queue on Windows 10. This process will come in handy if your printer misbehaves or if you’re unable to add/remove existing or new tasks to your printer. Once you are done with deleting tasks from the printing list on Windows 10, do check out our other guides that may help you with a few more things related to your printer and Windows 10 PC: How to Fix Error 740 While Adding Printer on Windows 10 and How to Check HP Printer Ink Levels on Windows 10.
