Who doesn’t prefer their native language? No matter where you live, you will be much more comfortable using a mobile phone or computer if it has all the text in the language that you can speak and read well. This is the reason why Windows 10 and Windows 11 allow the users to opt for any language that they prefer as the default language on their computers. In this article, we will show you how to change the default system language in Windows 10 and 11.
Steps to Change the Default System Language in Windows 10 and 11

Changing the default system language in Windows 10 and 11 is not at all difficult. In fact, it is one of those tasks that give so much value when compared to the minimum efforts they ask for. Here are the steps to replace the default system language in Windows 10 & 11 with your preferred language:
- Press the ‘Windows + I’ keys to open the Settings App on your computer.
- Select the ‘Time and Language’
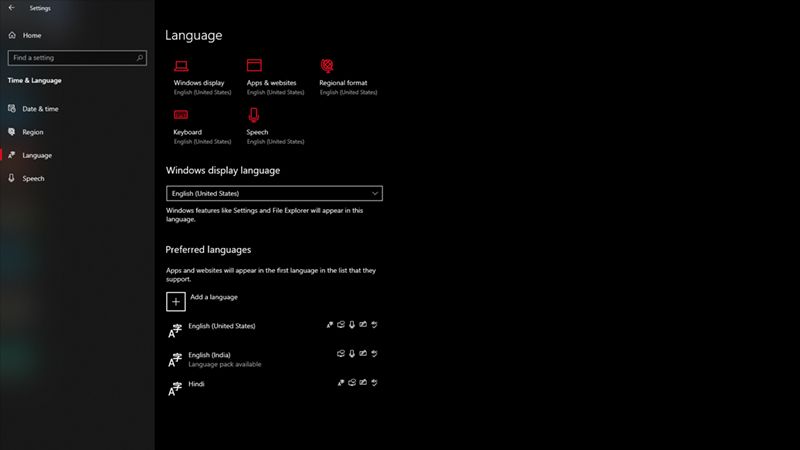
- Open the ‘Language’ tab for Windows 10 from the left pane.
For Windows 11, it is the ‘Language and Region’ tab.
- By default, Windows 10 & Windows 11 do not have any language installed other than English (US). So, click on the ‘Add a language’ option to get a language that is not available on your system already.
- On the next screen, use the table or the search bar to find the language that you want to set as the default system language in your Windows 10/11 computer.
- Your Windows 10/11 computer will then install the selected language.
- Lastly, just select the newly installed language from the bar right under the ‘Windows display language’
That’s it! You have successfully changed the default system language for your Windows 10/11 computer. This will make things easier for you if you are not used to English or prefer other languages.
Since you are done with changing the default language on your Windows PC, try checking out our other articles below: How to Set Google Chrome As Default Browser in Windows 11, and Windows 11 Hidden Features You Should Know (2022).
