
Connecting a Network printer is easy and can be done by anyone who knows how to use a computer. These types of printers are handy if you want to connect all the computers to one printer. You can also add a wired printer to your computer as a network computer. If you want to add a network printer to your Windows 10 computer then here is a guide to help you add them.
Steps to Add a Network Printer on Windows 10
Before trying to add a network printer to your Windows 10 device you need to know your printer’s IP address. If you have connected your printer then you can use Router’s portal to know your IP Address. You can also find your printer’s IP address on the printer’s app. After knowing the IP address of your network printer you can add your network printer by following these steps.
Adding Network Printer through Control Panel
You can add your network printer from the control panel of your computer by following this method:
- Open the “Control Panel” by searching “Control” in the search bar.
- Now, click on the “Hardware and Sounds” section.
- Now, on the top pane click on “Add a Printer“.
- In the next window, select “The printer that I want isn’t listed“.
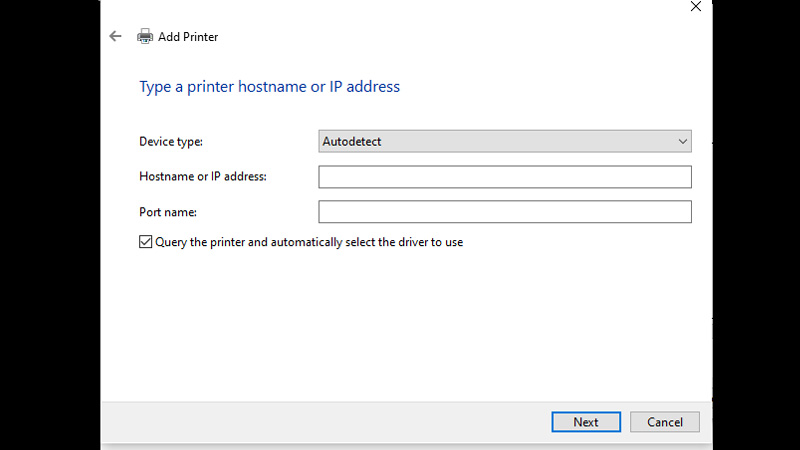
- In the next tab, check the box next to “Add a printer using TCP/IP address or hostname” and click “Next“.
- In the next step, type in the “IP Address” field the IP address of your printer and hit “Next“.
- The dialogue box will automatically detect your printer.
- After the scanning is done select “Use the driver that is currently installed (recommended)” and click next.
- Setup your printer’s additional preferences and then either select “Print Test Page” or “Finish” to complete the process.
Adding Network Printer through Settings App
You can add your network printer from the Settings app of your Windows 10 computer by following this simple workaround:
- Open the “Settings” app on your computer by pressing the “Windows + I” shortcut keys.
- Now, go to the “Devices” section and select “Printers and Scanners” from the left pane.
- Now, on the top click on “Add a Printer or scanner“.
- After a while, you will see the option “The Printer that I want isn’t listed“, click on that option.
- After this, in the next window, follow the steps you followed to add your printer through the control panel.
This is how you can add a network printer to your Windows 10 computer. If you are facing any errors while printing from your network printer then here is a separate guide on How to Fix Network Printing Error in Windows 10/11.