
Over the years Microsoft has changed many things in its Windows operating system. They have altered or removed many features that were present in Windows for a long time. One of those features is guest mode which was available before Windows 10. But, if you are using Windows 11 as your OS, you can still create and add a guest account through these tricks. In this guide, you will learn how to add a guest account in Windows 11.
Tricks to Add Guest Account in Windows 11
You can add a guest account in Windows 11 through these two methods that are discussed below:
Adding Guest Account through Windows Settings
You can add a guest account by using this simple workaround:
- Press the “Windows” button or navigate your cursor towards the “Start” menu to open the Settings menu.
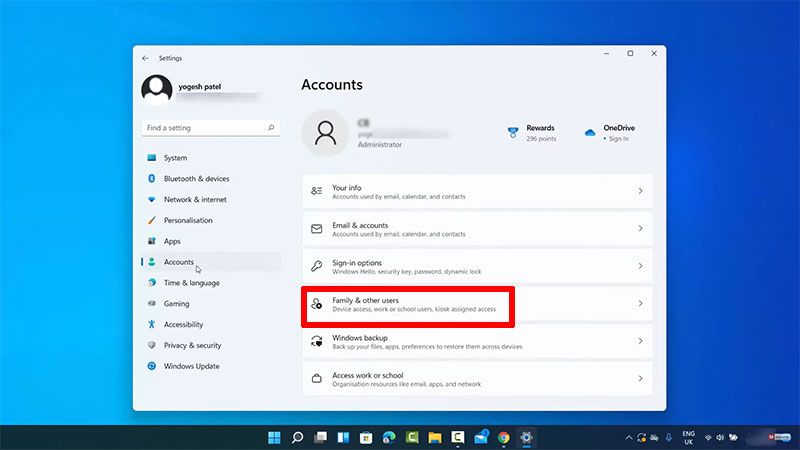
- Go to the “Accounts” and select “Family & other users”.
- Under “Other Users”, click on the “Add account” tab.
- In the next window, choose “I don’t have this person’s sign-in information”.
- Select “Add a user without a Microsoft account” in the next dialogue box.
- After this, a new window will pop up, here just type the name of the user who is going to use your computer.
- Click “Next” to add that account.
Now the other user can sign in to the account without a password (if it is not set) and do their work without accessing your data.
Using Command Prompt
You can instantly create and add a guest account by opening Command Prompt and following these steps:
- Click on the “Start” menu and type in the search bar “CMD” or “Command Prompt”, in the result, right-click on the “Command Prompt” and select “Run as Administrator”
- Once the “Command Prompt” is open, type net user visitor/add/active:yes and then press Enter keys on your keyboard.
- Once the command is successful, press Enter keys two times to skip the set password step.
This will instantly create a guest account that can be used by your family members or friends after you log out from your account and choose that account.
These are the steps through which you can create and add a guest account in Windows 11. If you want to know hidden features in Windows 11, do look at our guide on Best Windows 11 hidden features you should know.