
Among the new features of Windows 11, there is also a new function of Hardware-Accelerated GPU Scheduling. This feature helps reduce latency and improve performance by allowing the graphics card to manage its own memory. However, the feature does not work by default in Windows 11 as it requires the latest driver from the manufacturer, and only certain cards are supported. Let us find out below how to enable hardware-accelerated GPU scheduling in Windows 11.
How to Enable Hardware-Accelerated GPU Scheduling in Windows 11
Nvidia supports hardware-accelerated GPU scheduling, starting with its driver version 451.48 and later. If you have an Intel integrated graphics card, the feature is available from driver version 27.20.100.8190. If you have an AMD graphics card, you will need a 5600 series card or later. For Nvidia, you should have a GTX 1000 graphics card or later. Follow the steps to enable the hardware-accelerated GPU schedule on Windows 11 below.
- Right-click on the Start menu then go to Settings. To go faster, you can also use the keyboard shortcut Windows+I keys.
- Then click on System Settings and on the right side click on Display.
- Then at the bottom, in the Related settings section, click on Graphics.
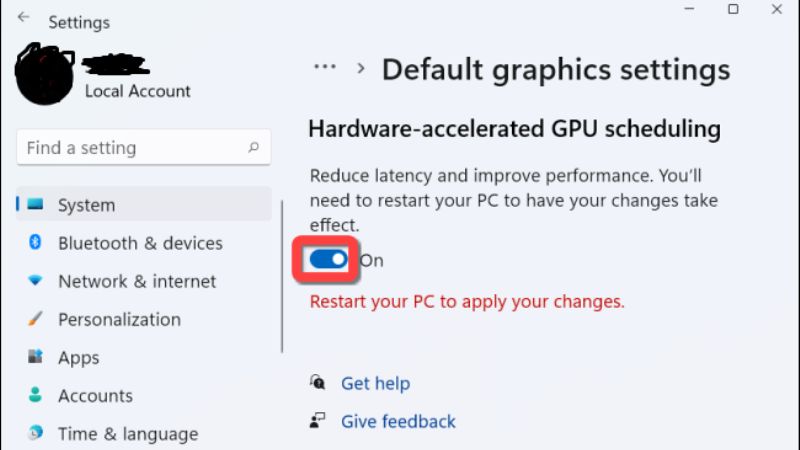
- At the top, go to Change default graphics settings.
- Enable the hardware-accelerated GPU scheduling option to reduce latency and improve performance.
- Restart the PC if Windows 11 prompts you to take the changes into account.
Enable Hardware-Accelerated GPU Scheduling in Windows 11 Via Registry
Another way to activate the GPU graphics processor schedule to hardware acceleration in Windows 11 is to edit the Windows registry.
- On your keyboard, press the Windows+ R keys together.
- Then type Regedit and press Enter key.
- Then in the left pane, expand or go to the following path:
HKEY_LOCAL_MACHINE\SYSTEM\CurrentControlSet\Control\GraphicsDrivers
- Then in the right pane, right-click New > 32-bit D-Word Value.
- Name this value
- Then double click on the HwSchMode value and replace 0 with 2.
- Finally restart the PC to take into account the changes.
That is everything you need to know about enabling hardware-accelerated GPU scheduling in Windows 11. For more information on the latest operating system, check out our other Windows 11 Troubleshooting Guides right now.