")
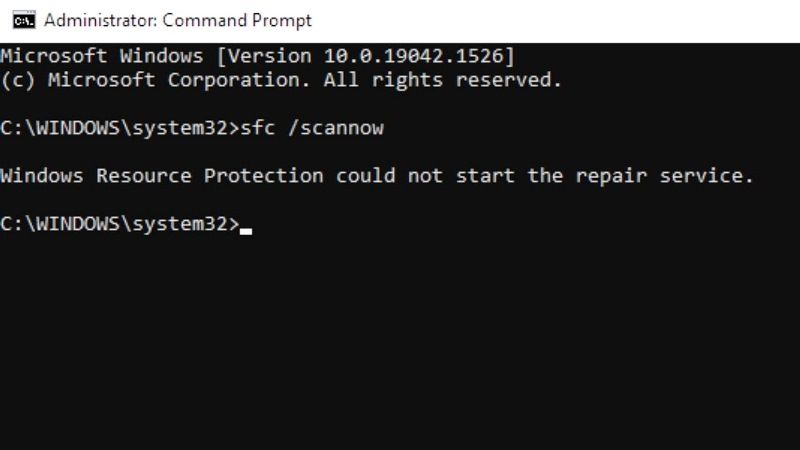
If you are trying to run System File Checker (SFC) scan on your PC but getting an error that states “Windows Resource Protection could not start the repair service”, don’t worry, as we have got you covered. This error usually happens due to issues with the TrustedInstaller service or permission problems. Hence, to resolve this error, in this guide, I will tell you how to fix this problem that you are getting on your Windows 10 or Windows 11 computer.
Fix: “Windows Resource Protection Could Not Start the Repair Service” Error (2023)
If you want to fix the “Windows Resource Protection Could Not Start the Repair Service” error on your Windows PC, you will either need to restart Windows Modules Installer (TrustedInstaller) or else start TrustedInstaller using Command Prompt (CMD). You can check both methods listed below to fix the error message on your Windows 11/10 computer.
How to Restart Windows TrustedInstaller
- In the Search box, type Run and press Enter.
- In the Run dialog box that opens, type “services.msc” without quotes and press Enter key.
- A new Services window will open.
- Search for the Windows Modules Installer and right click on it and click Properties.
- Here, configure the Startup type to Manual.
- To run the service if it is not running, press the Start button which is located under the Service status section.
- Finally, click OK and close the Services window and now check if it is possible to run the SFC scanner without any issues.
How to Start TrustedInstaller Using CMD
- Click on the Start menu and type CMD.
- From the top list, right-click on Command Prompt and select the “Run as administrator” option.
- In the CMD window, type the command mentioned below and press Enter key:
sc config trustedinstaller start= auto - After the process is finished, type another command mentioned below and press Enter key:
net start trustedinstaller - Finally, once the process is completed, you can now run the SFC scan without any problems.
That is all you need to know about how to fix the “Windows Resource Protection Could Not Start the Repair Service” error on your Windows 11/10 PC. In the meantime, do not forget to check out our other guides only on TechNClub.com: How to fix NTDLL.DLL Crash Error on Windows, and How to fix Windows Update Error 0x80244022.