After upgrading to the latest Windows 11 operating system, many users will find that the folders will show small thumbnails of the contents of the folder without opening those files. But there might be some situations where it will stop showing folder thumbnails, no matter what you do. So, if you are looking to solve this bug, in this guide, you will learn how to fix Windows 11 Thumbnails broken or Not Showing issues in detail below.
Fix: Windows 11 Thumbnails Broken or Not Showing Issues (2023)

There are several solutions to fix the Windows 11 Thumbnails broken or not showing problems. You can either try to Turn ON Thumbnails on Windows that might be disabled due to corrupted system files or else rebuild Thumbnail Cache to resolve the issue. Below, you can check out both methods to get rid of the broken thumbnail problem on your Windows 11 PC.
How to Enable Thumbnails on Windows 11
- First of all, in the Search box, type File Explorer.
- Press the Enter key to open the File Explorer.
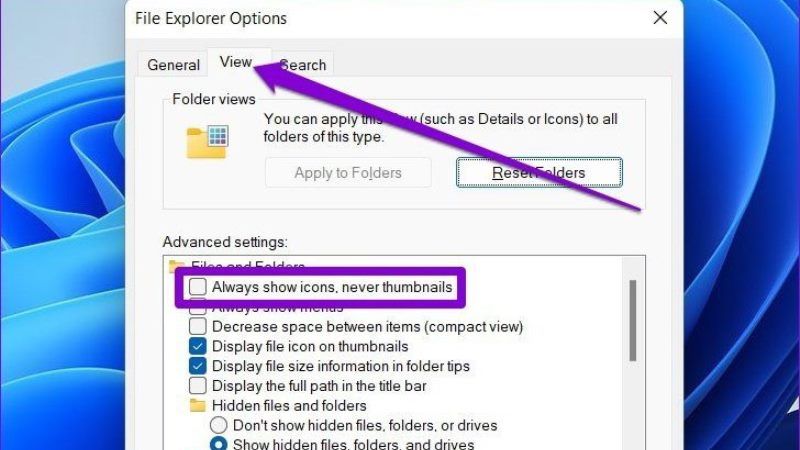
- In the next window, click on the View tab from the top.
- Finally, under Advanced Settings, uncheck the checkbox for “Always show icons, never thumbnails” and click the OK button. This will fix the broken thumbnails not showing issues on your Windows 11 computer.
How to Rebuild Thumbnail Cache on Windows 11
- First of all, click on the Start menu.
- Then click on the Settings app to open it.
- After that select System from the left pane side.
- On the right side, click on the Storage option which is located at the bottom.
- Under Storage, click on Temporary Files.
- At the bottom, you will see Thumbnails, select it and then click on the Remove files option from the top.
- That’s it, this will fix the thumbnail problems on Windows 11 PC.
That is all there is to know about how to fix Windows 11 Thumbnails broken or not showing issues. In the meantime, do not forget to check out our other guides only on TechNClub.com: How to Disable YouTube Auto-Playing Thumbnail, and How to fix Windows Unspecified Error Code: 0x80004005.
