
Your ISP (Internet Service Provider) always bundles up a DNS server with an internet subscription on your Windows 10 PC. However, certain DNS servers are slower and less secure than others. For example, Google Public DNS and Cloudflare DNS servers are among the fastest DNS servers you can get. These DNS servers are even more secure and private than what you get from your ISP. This is the reason why you would need to switch to a different DNS server on your Windows 10 computer. Today, we will show you how to change DNS on Windows 10 from the Settings and the Control Panel.
Windows 10: How to Change DNS Server?
There are multiple methods that you can try to use a different DNS on your Windows 10 device. We have mentioned these methods right below:
Method 1: Change Windows 10 DNS from Settings
- Press the ‘Windows + I’ keys to open the Settings app.
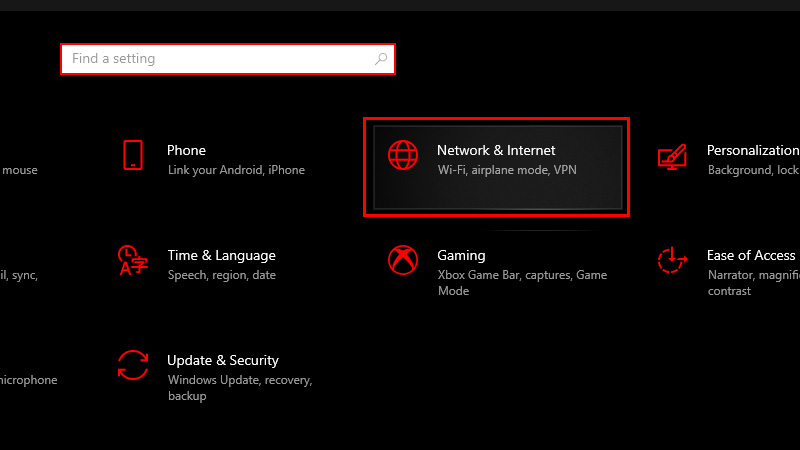
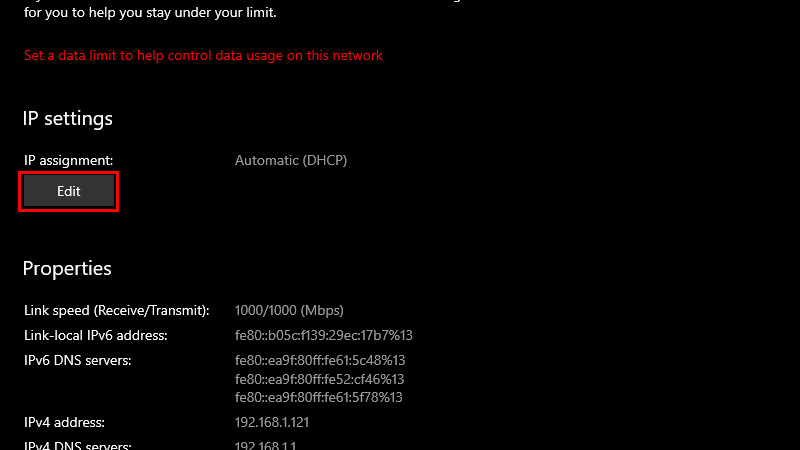
- Go to Network & Internet > Status > Properties > Edit.
![network-internet]()
![edit]()
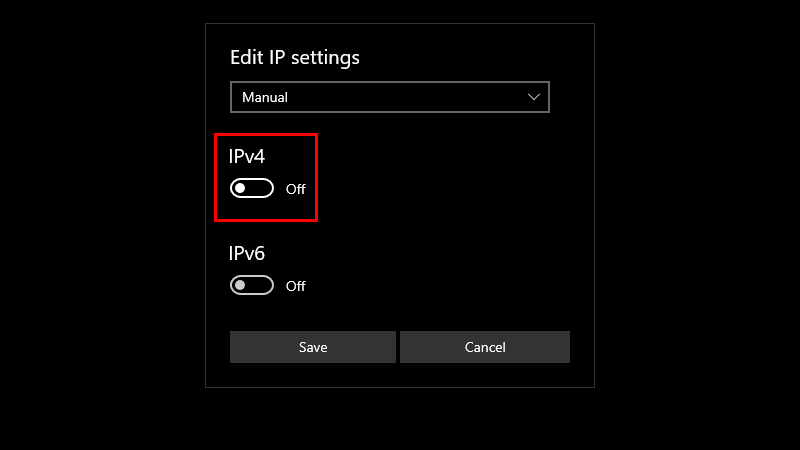
- This will open the ‘Edit IP Settings’ pop-up window.
- Open the drop-down menu and click ‘Manual’.
![select-manual]()
- Enable the toggle bar for ‘IPv4’.
![ipv4-toggle-bar]()
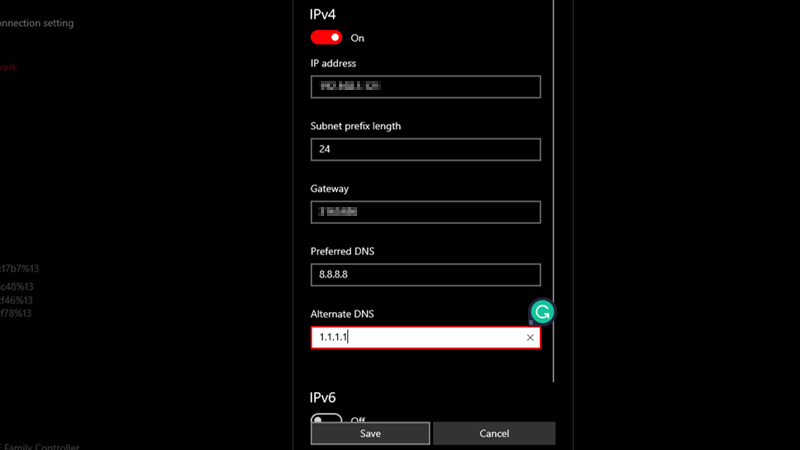
- Type your PC’s IP address under the ‘IP address’ section. (Refer to the ‘How to Find Windows 10 IP Address?’ section below)
- Type ’24’ under the ‘Subnet prefix length’ section.
- Fill in your router’s IP address under ‘Gateway’.
- Enter your preferred IP address under the ‘Preferred DNS’ and ‘Alternate DNS’ sections.
(We have mentioned the best DNS servers to use on Windows 10 later in this guide)![change-dns-settings]()
- Click ‘Save’.

Method 2: Change DNS on Windows 10 from the Control Panel
- Open the Start Menu on your Windows 10 PC.
- Type and search ‘Control Panel’.
![open-control-panel]()
- Open the first search result.
- Go to ‘Network and Internet’.
![network-and-internet-control-panel]()
- Select ‘Network and Sharing Center’.
![network-sharing-center]()
- Choose ‘Change adapter settings’.
![change-adapter-settings]()
- Right-click the ethernet or Wi-Fi, whatever you use on your Windows 10 computer.
![ethernet-properties]()
- Click ‘properties’.
![ipv4-properties]()
- Click ‘Internet Protocol Version 4 (TCP/IPv4)’ and select ‘Properties’.
- Turn on the ‘Use the following DNS server addresses’ section by clicking the circle next to it.
- Type the preferred and alternate DNS servers for your Windows 10 device.
![change-dns-control-panel]()
- Select OK > Close.


So, these are the methods to change the DNS server on Windows 10.
What is DNS?
DNS stands for Domain Name System, an important element that is required to surf the internet. A DNS server is a database system that stores the IP addresses of all the domains. It isn’t technically possible for you to remember and search for different websites’ IP addresses, right? So when you search for a website/domain by typing certain words, a DNS server maps the route for the required IP address to match your search result. In simple words, you cannot surf the internet without a reliable DNS server. Now that you know what a DNS server is, let us talk more about which DNS servers are best for you.
Best DNS Servers for Windows 10 or Any Device
Even if you have been using the DNS server provided by your ISP till now, you should try using other DNS servers too so that you can see the difference between their speeds and security. Here are two of the best DNS servers with their IP addresses that you can use on Windows 10:
- Google Public DNS: 8.8.8.8 or 8.8.4.4
- Cloudflare DNS: 1.1.1.1 or 1.0.0.1
As we have mentioned above, you just have to fill in the IP addresses of these two DNS servers to use them on Windows 10.
How to Find Windows 10 IP Address?
You can find the IP address of your Windows 10 PC by following these steps:
- On your computer, go to Settings > Network & Internet > Properties.
- Scroll down and under the ‘Properties’ section, you will see all the network details about your Windows 10 computer.
![win-10-ip-address]()
- Find your Windows 10 PC’s IP address there.

This is everything that you need to know about how to change the DNS server on Windows 10. Hopefully, this article will help you to pick the perfect DNS server for your Windows system. Do not forget to check out some other guides on similar topics: How to Change DNS Settings on Android Phone to Google DNS and How to change DNS on Windows 11.